Choose your country and language
- Nederlands, Belgique / België
- Česky, Česká republika
- Deutsch, Deutschland
- Español, España
- Português, Portugal
- English, Europe
- Français, France
- Italiano, Italia
- Magyar, Magyarország
- Nederlands, Nederland
- Deutsch, Österreich
- Polski, Polska
- Română, România
- Suisse / Schweiz / Svizzera
- Svenska, Sverige
- Suomeksi, Suomi
- Türkçe, Türkiye
- English, United Kingdom
- Slovenská, Slovak
-
Worldwide
- All Small Tools
- Calipers
- Micrometers & Micrometer Heads
- Inside Measuring Instruments
- Depth Measuring Instruments
- Height Gauges
- Indicators & Caliper Gauges
- Calibration Instruments
- Gauge Blocks
- Auxiliary Equipment
- Toolkits
- All CMM
- Small & Medium sized CMMs
- In-line & Shopfloor CMMs
- Large sized CMMs
- CMM Rotary Tables
- Probes
- Styli
- CMM Software
- Fixtures and Loading Systems
- Accessories
- SmartMeasure-AL
- All Vision
- Manual 2D Vision Systems
- Manual 3D Vision Systems
- 2D Vision System - QM-Fit
- 3D CNC Vision Systems
- 3D CNC Multi-sensor Vision Systems
- 3D CNC Micro Geometry Vision Systems
- Vision System Software
- Vision System Accessories
- All Optical
- Magnifiers
- Measuring Projectors
- Measuring Microscopes
- Microscope Units
- Objective Lenses
- TAGLENS
- All Hardness
- Portable Hardness Testers
- Rockwell Testers
- Vickers Testers
- Micro-Vickers Testers
- Hardness Testing Software
- Reference materials and indenters
- All Sensors
- Linear Gauges
- Low Force Gauges
- Counters and Display Units
- Laser Scan Micrometers
- Surface Measure
- Sensor Management Software
- All Data Management
- Data Management Software
- Mini Processors
- Signal Cables
- Wireless Communication
- Interfaces
- Timerbox, Digimatic Switch Box, Tolerance Box
- Micrometers & Micrometer Heads
- Digital & Mechanical Micrometers
- Micrometer Accessories
- Micrometer Heads
- Micrometer Head Accessories
- Inside Measuring Instruments
- Inside Micrometers
- Bore Gauges
- Inside Micrometer & Bore Gauge Accessories
- Indicators & Caliper Gauges
- Digital Indicators
- Indicator Accessories
- Lever Indicators
- Dial Indicators
- Dial Test Indicators Accessories
- Thickness, Caliper & Tension Gauges
- Gauge Blocks
- Steel Gauge Block Sets
- Steel Individual Gauge Blocks
- Ceramic Gauge Block Sets
- Ceramic Individual Gauge Blocks
- Special Gauge Blocks
- Gauge Block Accessories
- Small & Medium sized CMMs
- Manual CRYSTA-KM 565
- CRYSTA-Apex V - 500, 700, & 900 Series
- CRYSTA-Apex V - 1200, 1600 & 2000 Series
- CRYSTA-Apex EX Series for REVO
- STRATO-Active Series
- STRATO-Apex - 500, 700, & 900 Series
- STRATO-Apex - 1600 Series
- LEGEX Series
- Styli
- Styli Kits
- Straight Styli
- Diamond Coated Styli
- Master Ball
- Machine Tool Styli
- Star Styli
- Styli for Star Styli
- Cylinder Styli
- Disk Styli
- Tip Styli
- Extensions
- Holders
- Adapters
- Joints
- Screws for Cubes
- Tools
- StyliCleaner
- Fixtures and Loading Systems
- Standard Fixturing Kits
- Eco-Fix Kits
- Custom Fixtures from MGT
- Custom Loading Systems from MGT
- 3D CNC Vision Systems
- Quick Vision ACTIVE
- Quick Vision APEX / HYPER
- Quick Vision ACCEL
- Quick Vision ULTRA
- Measuring Projectors
- PJ Series
- PV Series
- PH Series
- M2 Software
- Data Processing Unit
- Edge Detection Sensor
- Accessories
- Measuring Microscopes
- TM Series Gen. B
- MF Series Gen. D
- MF-U Series Gen. D
- Illumination Sources
- Vision Unit
- QSPAK-VUE Software
- Objective Lenses
- ML-Series Objectives
- Brightfield Observation Objectives
- Brightfield/Darkfield Observation Objectives
- NIR Objectives
- NIR LCD Objectives
- NUV Objectives
- NUV LCD Objectives
- UV Objectives
- UV LCD Objectives
- Surface Roughness
- Surftest SJ-220
- Surftest SJ-310
- Surftest SJ-410
- Surftest SJ-500
- Surftest SJ-500P
- Surftest SV-2100P
- Formtracer Avant FTA-S3000
- Surftest Extreme SV-3000CNC
- Surftest Extreme SV-M3000CNC
- Surface Roughness & Contour
- Formtracer Avant FTA-D3000 / FTA-D4000 Series
- Formtracer CS-3300
- Formtracer Extreme SV-C4500CNC
- Formtracer Extreme SV-C4500CNC HYBRID Type 1
- Formtracer Extreme CS-5000CNC and CS-H5000CNC
- Micro-Vickers Testers
- Manual Micro-Vickers Testers
- Semi-Automatic Micro-Vickers Testers
- Automatic Micro-Vickers Testers
- Reference materials and indenters
- Hardness reference materials
- Hardness indenters and replacement balls
- Linear Gauges
- ABSOLUTE Digimatic Linear Gauge LGS Series
- Air Drive Unit
- Linear Gauge LG100 Series
- Linear Gauge LG200 Series
- Laser Hologauge
- Counters and Display Units
- EJ Counter and Interfaces for Linear Gauges
- EC Counter for Linear Gauges
- EG Counter for Linear Gauges
- EB Counter for Linear Gauges
- EH Counter for Linear Gauges
- EV Counter for Linear Gauges
- Display Unit for EV Counter
- Laser Scan Micrometers
- Laser Scan Micrometer Measuring Unit and Display Unit Package
- Laser Scan Micrometer Measuring Unit
- Laser Scan Micrometer
- Laser Scan Micrometer Display Unit
- Laser Scan Micrometer Optional Accessories
- DRO Linear Scales and Counters
- DRO Linear Scales AT103
- DRO Linear Scales AT103 - High Accuracy
- DRO Linear Scales AT113
- DRO Linear Scales AT113 - High Accuracy
- DRO ABS Linear Scales AT715
- Universal DRO KA-200 Counter
- NC Linear Scales
- NC Linear Scales ST36
- NC Linear Scales ST46-EZA
- NC Linear Scales ABS ST700
- NC Linear Scales ABS ST1300
- NC Linear Scales AT211
- NC Linear Scales ABS AT1100
- NC Linear Scales ABS AT1300
- Scale Units
- Horizontal ABSOLUTE Scale Coolant Proof IP66
- Horizontal ABSOLUTE Scale Standard
- Horizontal ABSOLUTE Scale Measurement Direction Switching
- Horizontal ABSOLUTE Scale Diameter Function
- Vertical ABSOLUTE Scale Standard
- Vertical ABSOLUTE Scale Measurement Direction Switching
- Vertical ABSOLUTE Scale Diameter Function
- Signal Cables
- USB Input Tool Direct (Digimatic-USB Cable)
- Digimatic Data Cables
- Digimatic Extension Cables
- Wireless Communication
- Wireless Communication System U-WAVE
- U-WAVE Bluetooth
- U-WAVE-T Connection Cables and Connection Units
 Aerospace
Complex aerospace applications need fast, extremely precise quality control to ensure accurate assemblies. See how Mitutoyo makes it happen
 Automotive
The automotive industry continues to innovate, and Mitutoyo delivers the advanced inspection and scanning capabilities to help manufacturers achieve ongoing production
 Energy
Mitutoyo’s measurement and analysis solutions are designed to help energy providers improve reliability and increase equipment uptime.
 Medical
To protect patient well-being, medical applications require exceptional accuracy. See how extensively tested solutions from Mitutoyo can help you achieve it.
 Electronics
The non-contact and vision measurement solutions from Mitutoyo bring microscopic accuracy to smaller and denser electronic components
 Original Equipment Manufacturers
Mitutoyo OEM can address missing expertise or resources by supplying you with our renowned Metrology equipment that seamlessly integrates into your products.
 UKAS Calibration
Our UKAS accredited laboratory can handle all your metrology needs.
 Subcontract Measurement
A full range of subcontract measurement, reporting and programming services.
 Training
Specialist in-house and on-site courses covering all types of metrology.
 Service Contracts
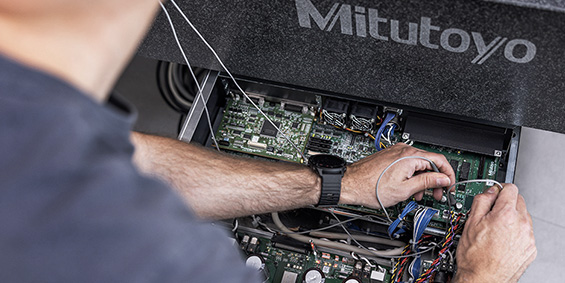
Anticipate your maintenance costs and provide savings on future upgrades.
 IT Support
Offering essential maintenance, software upgrades and hardware replacement whilst minimising critical downtime.
 Repairs & Spare Parts
Our purpose built repair and calibration facility is home to skilled and certified technicians.
 FREE Education Pack
A range of education literature designed to serve as convenient references to dimensional metrology.
 Metrology Handbook
Aimed at anyone interested in gaining an understanding of the fundamentals of dimensional metrology.
 E-Learning
For those interested in metrology, Mitutoyo offers E-Learning courses to help train students, staff, or even hobbyists.
 Mitutoyo Worldwide
The world's biggest metrology company
 Mitutoyo in the UK
Mitutoyo have four facilities offering a wide range of services in the UK.
 EKO House
An important key to understanding Mitutoyo's company philosophy is the EKO house donated by company founder Yehan Numata.
 Promotions & Discounts
Discover the latest product and service promotional deals and discounts available.
 Case Studies
For an overview of Mitutoyo's capabilities, take a to look over our collection of case studies.
 Newsletter
Sign up to our eNewsletter and you could win a Metrology Pack!
 Product Catalogue
View our extensive product range in our online UK catalogue.
 Software & Updates
Download our software and updates easily and conveniently. (EU website )🇪🇺
 Declarations of Conformity
Here you can download the full versions for the EU and the UK.
 Virtual Showroom
Experience our interactive virtual showroom.
 Newsletter
Sign up to our eNewsletter and you could win a Metrology Pack!
-
Products
- Back Products
- Products
-
Small Tools
- Back Small Tools All Small Tools
- Calipers
-
Micrometers & Micrometer Heads
- Back Micrometers & Micrometer Heads Micrometers & Micrometer Heads
- Digital & Mechanical Micrometers
- Micrometer Accessories
- Micrometer Heads
- Micrometer Head Accessories
-
Inside Measuring Instruments
- Back Inside Measuring Instruments Inside Measuring Instruments
- Inside Micrometers
- Bore Gauges
- Inside Micrometer & Bore Gauge Accessories
-
Depth Measuring Instruments
- Back Depth Measuring Instruments Depth Measuring Instruments
- Depth Micrometers
- Depth Calipers & Gauges
- Depth Caliper Accessories
- Height Gauges
- Indicators & Caliper Gauges
-
Calibration Instruments
- Back Calibration Instruments Calibration Instruments
- Height Masters
- Check Masters
- Calibration Tools
- Gauge Blocks
- Auxiliary Equipment
- Toolkits
-
CMM
- Back CMM All CMM
- Small & Medium sized CMMs
-
In-line & Shopfloor CMMs
- Back In-line & Shopfloor CMMs In-line & Shopfloor CMMs
- MACH Ko-ga-me
- MACH 3A 653
- MACH V 9106
- MiSTAR 555
-
Large sized CMMs
- Back Large sized CMMs Large sized CMMs
- CARB-Series
-
CMM Rotary Tables
- Back CMM Rotary Tables CMM Rotary Tables
- MRT240 Rotary Table
- MRT320 Rotary Table
- Probes
- Styli
-
CMM Software
- Back CMM Software CMM Software
- MiCAT Planner
- MCOSMOS
- MAFIS Express
- MSURF
-
Fixtures and Loading Systems
- Back Fixtures and Loading Systems Fixtures and Loading Systems
- Standard Fixturing Kits
- Eco-Fix Kits
- Custom Fixtures from MGT
- Custom Loading Systems from MGT
- Accessories
- SmartMeasure-AL
-
Vision
- Back Vision All Vision
-
Manual 2D Vision Systems
- Back Manual 2D Vision Systems Manual 2D Vision Systems
- Quick Image
- Quick Image Software
-
Manual 3D Vision Systems
- Back Manual 3D Vision Systems Manual 3D Vision Systems
- Manual Quick Scope
- Quick Scope Software
- 2D Vision System - QM-Fit
-
3D CNC Vision Systems
- Back 3D CNC Vision Systems 3D CNC Vision Systems
- Quick Vision ACTIVE
- Quick Vision APEX / HYPER
- Quick Vision ACCEL
- Quick Vision ULTRA
-
3D CNC Multi-sensor Vision Systems
- Back 3D CNC Multi-sensor Vision Systems 3D CNC Multi-sensor Vision Systems
- Quick Vision Hybrid
- Quick Vision WLI
-
3D CNC Micro Geometry Vision Systems
- Back 3D CNC Micro Geometry Vision Systems 3D CNC Micro Geometry Vision Systems
- UMAP Vision Systems
- UMAP Software
-
Vision System Software
- Back Vision System Software Vision System Software
- QVPAK
- QSPAK
- QIPAK
- Vision System Accessories
-
Optical
- Back Optical All Optical
-
Magnifiers
- Back Magnifiers Magnifiers
- Pocket Comparator
- Clear Loupes
-
Measuring Projectors
- Back Measuring Projectors Measuring Projectors
- PJ Series
- PV Series
- PH Series
- M2 Software
- Data Processing Unit
- Edge Detection Sensor
- Accessories
- Measuring Microscopes
-
Microscope Units
- Back Microscope Units Microscope Units
- Microscope Unit FS70 Series
- Video Microscope Unit VMU Series
- Objective Lenses
- TAGLENS
- Form
-
Hardness
- Back Hardness All Hardness
-
Portable Hardness Testers
- Back Portable Hardness Testers Portable Hardness Testers
- Leeb Hardness Testing HH-V400
- Digital and Analogue Durometers HH-300
-
Rockwell Testers
- Back Rockwell Testers Rockwell Testers
- Manual Machines
- Semi Automatic Machines
- Automatic Machines
-
Vickers Testers
- Back Vickers Testers Vickers Testers
- Manual Testers
- Semi Automatic Testers
- Automatic Testers
- Micro-Vickers Testers
-
Hardness Testing Software
- Back Hardness Testing Software Hardness Testing Software
- AVPAK
-
Reference materials and indenters
- Back Reference materials and indenters Reference materials and indenters
- Hardness reference materials
- Hardness indenters and replacement balls
- Sensors
-
Digital Scales
- Back Digital Scales All Digital Scales
- DRO Linear Scales and Counters
- NC Linear Scales
-
Scale Units
- Back Scale Units Scale Units
- Horizontal ABSOLUTE Scale Coolant Proof IP66
- Horizontal ABSOLUTE Scale Standard
- Horizontal ABSOLUTE Scale Measurement Direction Switching
- Horizontal ABSOLUTE Scale Diameter Function
- Vertical ABSOLUTE Scale Standard
- Vertical ABSOLUTE Scale Measurement Direction Switching
- Vertical ABSOLUTE Scale Diameter Function
-
Data Management
- Back Data Management All Data Management
-
Data Management Software
- Back Data Management Software Data Management Software
- MeasurLink 10
- USB-ITPAK
-
Mini Processors
- Back Mini Processors Mini Processors
- Digimatic Mini Processor DP-1VA LOGGER
- Signal Cables
- Wireless Communication
- Interfaces
-
Timerbox, Digimatic Switch Box, Tolerance Box
- Back Timerbox, Digimatic Switch Box, Tolerance Box Timerbox, Digimatic Switch Box, Tolerance Box
- Digimatic Timerbox
- Digimatic Switch Box
-
Software
- Back Software All Software
-
CMM Software
- Back CMM Software CMM Software
- MiCAT Planner
- MCOSMOS
- MAFIS-Express
- MSURF
- Vision System Software
-
Form Software
- Back Form Software Form Software
- Formtracepak
- Roundpak
- Hardness Testing Software
- Sensor Management Software
-
Data Management Software
- Back Data Management Software Data Management Software
- Measurlink 10
- USB-ITPAK
- Bespoke
- Automated Measuring Devices
- Industries
-
Services
- Back Services
- Services
-
Bespoke Solutions
- Back Bespoke Solutions
- Bespoke Solutions
- UKAS Calibration
-
Subcontract Measurement
- Back Subcontract Measurement
- Subcontract Measurement
- Training
- Service Contracts
- IT Support
- Repairs & Spare Parts
- Support
- Education
-
Corporate
- Back Corporate
- Corporate
-
Mitutoyo Worldwide
- Back Mitutoyo Worldwide
- Mitutoyo Worldwide
- Name & Philosophy
- Factory Tours
- Mitutoyo Corporation
-
Mitutoyo History
- Back Mitutoyo History
- Mitutoyo History
- Mitutoyo in Europe
- Global Gateway
-
Mitutoyo in the UK
- Back Mitutoyo in the UK
- Mitutoyo in the UK
- Job Opportunities
- Certifications & Accreditations
- Sustainability
- EKO House
-
News
- Back News
- News
-
Events & Exhibitions
- Back Events & Exhibitions
- Events & Exhibitions
-
Promotions & Discounts
- Back Promotions & Discounts
- Promotions & Discounts
- Case Studies
- Newsletter
-
Resources
- Back Resources
- Resources
-
Product Literature
- Back Product Literature
- Product Literature
- Product Catalogue
- Software & Updates
- Declarations of Conformity
- Virtual Showroom
- Newsletter
Starting as a small research institute in 1934, Mitutoyo has grown into a global company that is known around the world.
It all began with the single-minded passion of our founder, Yehan Numata, who wanted to contribute to the world's development and people's happiness through business.
That aspiration continues to be passed down even today, in these ever-changing times.
Inheriting our aspirations, spanning the turn of the century
Timeline
1934
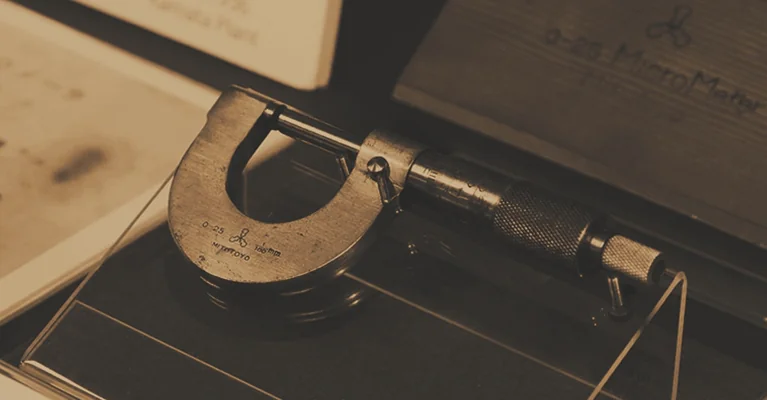
- Keihan Numata established a research center in Musashino, Tokyo, to domestically produce micrometers.
1936
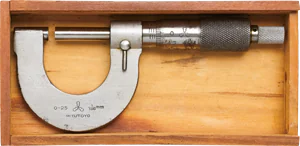
- Founded Kamata Factory at Kamata in Tokyo and named Mitutoyo Manufacture.
- Succeeded in domestic production of Micrometers.
1938
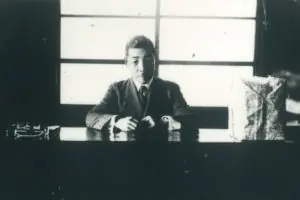
- The company was restructured into a joint-stock company, and Yoshinori Numata was appointed president.
1940
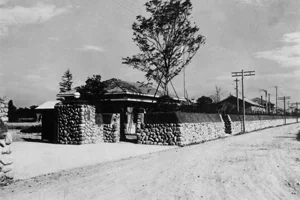
- Established Mizonokuchi Plant in Kawasaki, Kanagawa, for mass production of micrometers, and immediately started production.
1942
- Gauge block prototype.
1943
- Capacitive electric micrometer prototype.
1944
- Established Utsunomiya Plant for mass production of high-speed film perforators, and immediately started production.
1947
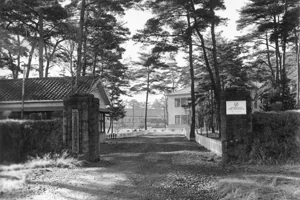
- Established Hiroshima Research Center in Shiwa, Hiroshima Prefecture to preserve micrometer manufacturing technology.
- Micrometer production resumed.
- Automatic weight sorting machine developed.
1949
- Started trial production of Calipers.
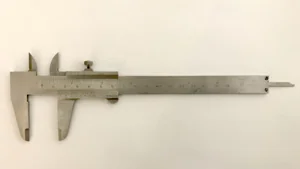
1952
- Started production of indicating micrometers.
- "Snap Meter" production commenced.
- 3m outside micrometer (the largest in the world at that time) completed.
1953
- Grinding gauge production begins.
1954
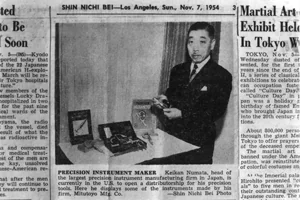
- Yehan Numata attended the International Metrology Conference (USA), exhibited corporate products and established a foothold for exports.
1956
- Started production of Bore Gauges.
1957
- Started production of Profile Projectors.
1958
- Started production of Height Masters.
- Started production of Dial Test Indicators.
- Started production of Precision Surface Plates.
- Started production of Small Stainless Steel Calipers.
1959
- Separated the sales department and founded Mitutoyo Trade Corporation instead.
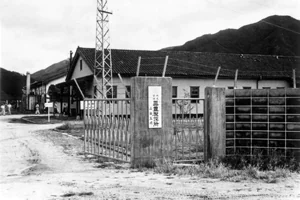
- Established Hiroshima Plant in Kure, Hiroshima prefecture, and merged with Hiroshima Research Laboratory aiming for integrated production of micrometers.
- Started production of Dial Indicators.
- Started production of Height gauges.
- Started production of Toolmakers Microscopes.

1960
- Developed roughness specimen for surface texture measurement.
- Started production of Large-Size Calipers.
1961
- Started production of Electric Dial Indicators.
1962
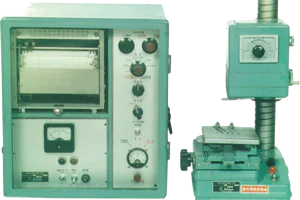
- Started production of Okoshi-system surface roughness testers.
- Started production of Dial Calipers.
1963
- Founded the first overseas corporation “MTI Corporation” (currently Mitutoyo America Corporation) in New York City, USA.
- Started production of electric comparators called “Mu-Checker”.
- Developed strain gauge system ultra comparators.

1967
- Numata Research Laboratory raised to a dedicated factory of gauge blocks.
- Established Hiroshima Molding Factory (currently Hiroshima Forming Material Plant) by separating the molding division of Hiroshima Plant.
- Started production of “Surftest”, which is an averaging-type surface roughness tester.
- Started producing Gauge Block Standard Sets.
1968
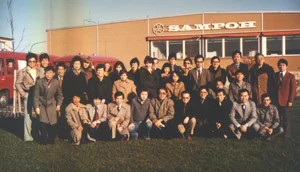
- Founded Sampo Messgeräte GmbH (then after Mitutoyo Messgeräte GmbH) in Dusseldorf, Germany.
- Yehan Numata was inaugurated as the chairman of the board of directors and Junzo Katayama as the president.
- Developed and started production of 2D coordinate measuring machines.
1969
- Developed and started production of three-point type Inside micrometer named “Holtest”.
- Started production of CMMs.
1970
- Established and started operation of Batoh Factory as Utsunomiya Sub-Factory at Batoh-cho, Nasu-gun, Tochigi prefecture.
- Started production of CMMs equipped with Mitutoyo developed linear scales.
- Started production of 2-column type height gauges with counter.
1971
- Toshihide Numata was inaugurated as the president.
- Started production of outside micrometers with counter.
- Developed horizontal-type CMMs.
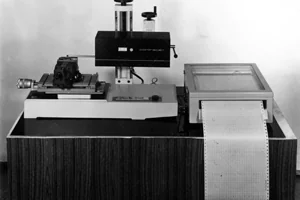
- Developed (the first in the world) a contour measuring machine named “Contracer”.
1972
- Developed a table rotary-type roundness measuring machine.
1973
- Founded Mitutoyo Canada Inc.
1974
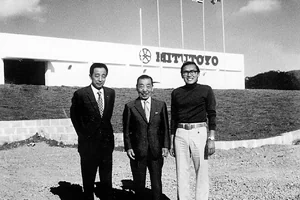
- Founded Mitutoyo do Brazil Industria e Comercio Ltda. and established Suzano Plant as the first full-scale overseas production base.
1975
- Mitutoyo Metrology Institute was opened.
- Started production of “Linear Scale” Units.
1976
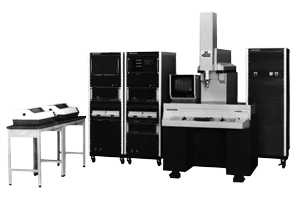
- Developed a CNC CMM.
1977
- Founded Onomi Precision Corporation at Onomi village in Kochi prefecture as a cooperative corporation of Hiroshima Plant.
- Started production of “check masters”.
1978
- Founded Mitutoyo Asia Pacific Pte. Ltd. in Singapore.
1979
- Founded Mitutoyo (UK) Ltd. in Andover, England.
- Founded Mitutoyo Mexicana SA de CV in Mexico City.
- Founded Mitutoyo-Messgeräte Leonberg GmbH, in Germany.
- Operations started in Shiwa Factory, sub-factory of Hiroshima Plant.
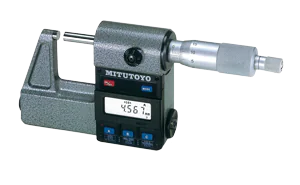
- Started production of Digimatic Micrometers, “MD Series”.
- Manufactured CNC CMM for NRLM-type large-bore thread gauges.
- Developed inspection instruments for dial indicators.
1980
- Yasuura Factory established in Yasuura-cho, Toyota-gun, Hiroshima prefecture.
- Started production of “Digimatic Height Gauges”, “HD Series”.
- Developed probe automatic exchangeable universal CMM “MBS” for roundness measurement.
1981
- Founded Sampo Nederland BV (currently Mitutoyo Nederland BV) in the Netherlands.
- Founded Mitutoyo Scandinavia AB.
- Started production of “Digimatic indicators”, “ID Series”.
1982
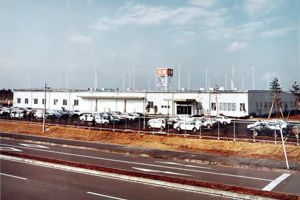
- Established and started operation of Kiyohara Plant at Kiyohara district in Utsunomiya as a dedicated factory for linear scales.
- Founded Mitutoyo Belgium N.V.
1983
- CT Laboratories opened in Germany.
- Started production of Digimatic Calipers, “CD Series”.
- Started production of Laser Scan Micrometers.
1984
- Developed optical microscope FS Series.
1985
- Yehan Numata was inaugurated as the Executive Advisor, Toshihide Numata as the chairman of the board of directors, and Yoshiteru Numata as the president.
- Established Miyazaki Plant (dedicated to gauge block production) at Tano-cho in Miyazaki prefecture and succeeded in production from Numata Research Laboratory.
- Developed portable surface roughness tester “Surftest 201”.

1986
- Founded Mitutoyo France S.A.R.L.
- Founded Micro Encoder Inc. in Kirkland, U.S.A.
- Started production of non-contact machine for measuring roll diameters.
1987
- Founded Mitutoyo Taiwan Co., Ltd. in Taipei, Taiwan.
- Founded Mitutoyo Italiana S.R.L.
- Renamed to Mitutoyo Corporation and merged into Mitutoyo Trade Corporation.
- Established and started operation of Shiwa Plant in Higashi-Hiroshima as a dedicated factory for micrometers.
- Established a subterranean institute building for high precision scales at Kiyohara Plant.
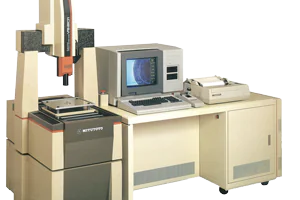
- Started production of non-contact CMMs (VS).
- Started production of measurement data network system “μ-net”.
1988
- Founded Mitutoyo Schweiz AG in Zurich, Switzerland.
- Founded Mitutoyo (Malaysia) Sdn. Bhd.
- Developed and started production of ceramic gauge blocks.
- Developed a length measuring encoder “laser holoscale”.
1990
- Founded European Research Laboratory in the Netherlands for researching basic technology of measurement.
- Akashi Corporation, as a group company of Mitutoyo, took over the testing machines and measuring instruments business from Akashi Seisakusho.
1991
- Developed a roundness measuring machine “RA600 Series”, provided with analysis software running on a personal computer.
- Developed an XY position detecting encoder.
1992
- Tsukuba Research Laboratory established in Tsukuba, Ibaraki prefecture.
1993
- Developed an interferometer as the standard for gauge block calibration.
- Developed ABS Digimatic linear encoder.
- Started production of ABSOLUTE Digimatic Calipers.
1994
- Founded Mitutoyo Korea Corporation.
- Developed and started production of non-contact.
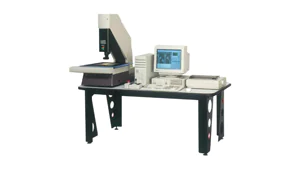
- CNC vision measurement machine named Quick Vision Series.
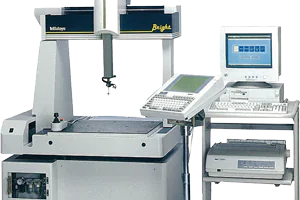
- Developed and started production of economy-type CNC CMM "Bright Series”.
- Uses environmentally friendly solar cells.
- Started production of ABS solar-type Digimatic calipers.
1995
- Norio Takatsuji was inaugurated as the President.
- Started production of ABS Digimatic Indicators.
- Developed a vertically-dual head differential-type gauge block comparator.
1996
- Founded Mitutoyo South Asia Pvt. Ltd. in New Delhi, India.
- Developed vision measuring machine “Quick Scope QS series”.
- Multi-joint typed CMM digitizer “spin arm”.
1997
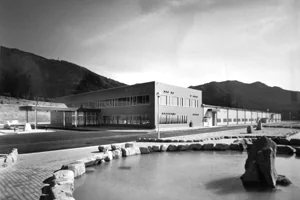
- Established and started operation of Nakatsugawa plant.
- Founded Mitutoyo (Thailand) Co., Ltd.
- Founded by KOMEG Industrielle Messtechnik GmbH.
- Founded Mitutoyo Finance Europe AG.
- Developed and released CMM with temperature compensation function: “FALCIO Series” provided with analysis software for running on a personal computer.
1998
- Founded Mitutoyo Measuring Instruments (Suzhou) in Suzhou, China.
- Developed and released horizontal CNC CMM for in-line measurement MACH Series.
- Developed and released ultra-high accuracy CNC CMM LEGEX Series.
1999
- Founded Mitutoyo Association for Science and Technology.
- Developed non-contact laser displacement gage laser indicator “LI-4030N/5030T”.
- Developed the world's largest 35-ton vibration testing machines "NASD".
2000
- Founded Mitutoyo Finance Europe AG.
- Detector integrated surface roughness/contour measurement.
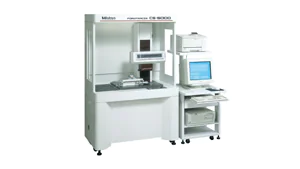
- Developed integrated detector hybrid surface roughness & contour tester “CS-5000”.
- Developed flexible measuring gauge for workshop use "QM-Measure".
2001
- Kazusaku Tezuka was inaugurated as the President.
- Founded Shanghai Mitutoyo.
- Founded Mitutoyo Sul Americana Ltda. Argentina Branch.
- Released integrated display/digital bore gauge, ABS digimatic bore gauge “CG-D100”.
2002
- Founded Poland Mitutoyo.
- Founded Mitutoyo Cesko s.r.o.
- Released moving-bridge-type CNC coordinate measuring machines “FALCIO-Apex2000/3000” Series.
- Released a micro part form measuring system “UMAP Vision System”.
- Released 2D vision measuring machines “QUICK IMAGE Series”.
2003
- Released world’s first CNC form measuring instruments series.
- Released digital height gauge with built-in absolute scale.
- Released IP65 coolant-proof micrometer.
- Released IP66 coolant-proof caliper.
2004
- Integrated Akashi Corporation, Meiho Engineering Limited, and Meioh Giken Limited.
- Founded Tianjin Mitutoyo.
- Founded Mitutoyo Hungary.
- Released ultimate absolute coolant-proof caliper “super caliper”.
- Released column-moving CNC surface roughness measuring system “SV-3000CNC”.
- Released world’s highest precision measuring microscopes “Hyper MF/MF-U”.
2005
- Founded Mitutoyo Indonesia.
2006
- Toshihide Numata was inaugurated as the Chairman & President.
- Released gauge blocks with thermal expansion coefficient.
2007
- Masashi Sakamoto was inaugurated as the President.
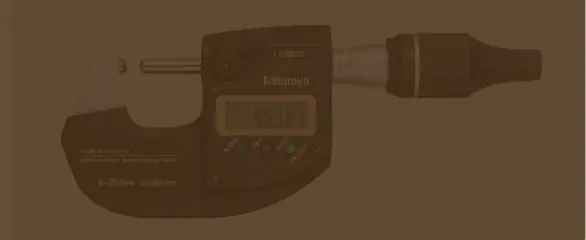
- Released ultimate digital micrometer “QuantuMike”.
2008
- Relocation detection system adopted for CNC high-precision measuring machines.
- Released low-priced, easy-to-operate measurement data wireless communication system “U-WAVE”.
2009
- Toru Nakagawa was inaugurated as the President.
2010
- Founded Mitutoyo Europe GmbH.
2011
- Released CNC measuring head “MACH Ko-ga-me”.
- Released Rockwell hardness testing machines HR-100 to 400 series.
- Launched non-contact line laser probe SurfaceMeasure606 for CNC Coordinate measuring machines.
- Released non-contact 3D measuring system Hyper Quick Vision WLI Series.
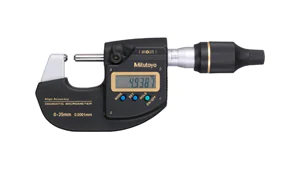
- Released high accuracy digimatic micrometer MDH-25M.
- Released contracer CV-4500.
- Released micro Vickers hardness testing machines HM-200 Series.
- Released ABS Solar-Powered Digimatic Indicator ID-SS.
2012
- Founded Mitutoyo Russia.
- Founded Mitutoyo Vietnam.
- Founded Mitutoyo Romania.
- Mitutoyo Leeport Metrology Corporation became consolidated subsidiary company.
- Released Compact size, separate incremental scale ST46-EZA Glass linear scales.
- Released Fiber Scale ST-F11.
2013
- Founded Mitutoyo Austria GmbH.
- Founded Micro Encoder Los Angeles, Inc.
- Released high precision height gauge QM-Height Series.
2014
- Founded Mitutoyo Philippines, Inc.
- Released high precision Height Gauge QM-Height Series.
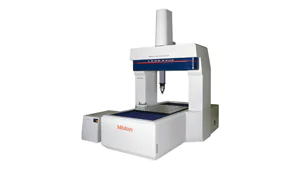
- Released ultra-high accuracy CNC CMM “New LEGEX Series”.
- Released Contracer CV-4500.
- Released micro Vickers hardness testing machines HM-200 Series.
- Released ABS Solar-Powered Digimatic Indicator ID-SS.
2015
- Released high-speed, high-resolution absolute tape scale ABS ST1300 series.
- Released display unit for linear scale KA-200 counter.
- Released automatic measurement program generation software MiCAT Planner.
2016
- Acquisition of shares and commercial alliance for TAG Optics Inc.
- Acquisition of shares and commercial alliance for Mapvision Ltd.
- Founded Mitutoyo Optics Manufacturing America Corporation.
- Released IP67 ABSOLUTE coolant proof caliper.
- Released CNC vision measuring system Quick Vision Active Series.
- Released absolute linear scale AT-1100 series.
- Indicator inspection instrument i-Checker.
2017
- Toru Nakagawa was inaugurated as the chairman of the board of directors.
- Yoshiaki Numata was inaugurated as the president.
2018
- Released measurement data wireless communication system "U-Wave fit".
2020
- Conclusion of Marketing Agreement with Shimadzu Corporation for Dimensional X-ray CT system.
- Conclusion of sponsorship agreement with professional basketball team KAWASAKI BRAVE THUNDERS.
- Released shop-floor Type CNC CMM "MiSTAR 555".
2021
- Released CNC Roundness/Cylindricity Measuring System "ROUNDTRACER EXTREME".
2022
- Released new generation ABSOLUTE Digimatic Indicator "ID-C".
2024
- Released ultra-high accuracy CNC CMM "Legex Takumi model".
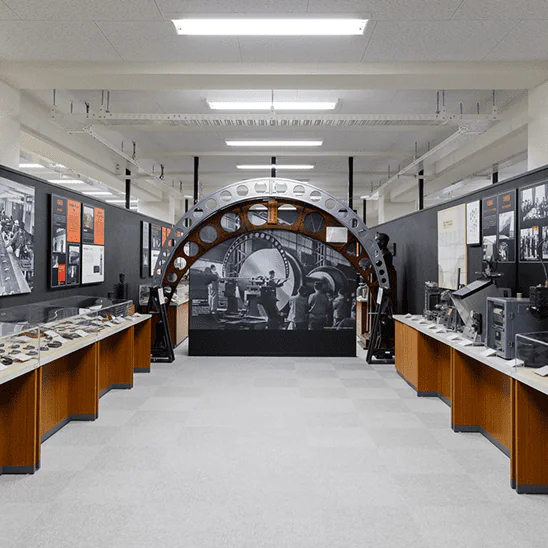
Museums and History Centers
Experience the history of Mitutoyo and the evolution of precision measurement around the world
Take a look at our exhibition corner themed around the history of Mitutoyo, which has been at the forefront of the industry since its founding in 1934, and the evolution of precision measurement around the world, as well as through historical collections that have been recognized as part of the Modern Industrial Heritage Group by the Ministry of Economy, Trade and Industry. Experience the history of precision measurement and measurement technology.
