- Nederlands, Belgique / België
- Česky, Česká republika
- Deutsch, Deutschland
- Español, España
- Português, Portugal
- English, Europe
- Français, France
- Italiano, Italia
- Magyar, Magyarország
- Nederlands, Nederland
- Deutsch, Österreich
- Polski, Polska
- Română, România
- Français / Deutsch, Suisse / Schweiz
- Svenska, Sverige
- Suomeksi, Suomi
- Türkçe, Türkiye
- English, United Kingdom
- Slovenská, Slovak
-
Worldwide
- All Small Tools
- Calipers
- Micrometers & Micrometer Heads
- Inside Measuring Instruments
- Depth Measuring Instruments
- Height Gauges
- Indicators & Caliper Gauges
- Calibration Instruments
- Gauge Blocks
- Auxiliary Equipment
- All CMM
- Small & Medium sized CMMs
- Large sized CMMs
- In-line & Shopfloor CMMs
- Probes
- Styli
- Enclosures
- CMM Software
- Fixtures and Loading Systems
- Accessories
- All Vision
- Manual 2D Vision Systems
- Manual 3D Vision Systems
- 3D CNC Vision Systems
- 3D CNC Multi-sensor Vision Systems
- MiSCAN Vision Systems
- 3D CNC Micro Geometry Vision Systems
- Vision System Software
- Vision System Accessories
- All Optical
- Magnifiers
- Measuring Projectors
- Measuring Microscopes
- Microscope Units
- Objective Lenses
- TAGLENS
- Illumination Units
- All Hardness
- Portable Hardness Testers
- Rockwell Testers
- Vickers Testers
- Automatic Vickers Testers
- Micro-Vickers Testers
- Hardness Testing Software
- Reference materials and indenters
- All Sensors
- Linear Gauges
- Low Force Gauges
- Counters and Display Units
- Laser Scan Micrometers
- Surface Measure
- Sensor Management Software
- All Data Management
- Data Management Software
- Mini Processors
- Signal Cables
- Wireless Communication
- Interfaces
- Timerbox, Digimatic Switch Box, Tolerance Box
- Micrometers & Micrometer Heads
- Digital & Mechanical Micrometers
- Micrometer Accessories
- Micrometer Heads
- Micrometer Head Accessories
- Inside Measuring Instruments
- Inside Micrometers
- Bore Gauges
- Inside Micrometer & Bore Gauge Accessories
- Indicators & Caliper Gauges
- Digital Indicators
- Indicator Accessories
- Lever Indicators
- Dial Indicators
- Dial Test Indicators Accessories
- Thickness, Caliper & Tension Gauges
- Gauge Blocks
- Steel Gauge Block Sets
- Steel Individual Gauge Blocks
- Ceramic Gauge Block Sets
- Ceramic Individual Gauge Blocks
- Special Gauge Blocks
- Gauge Block Accessories
- Small & Medium sized CMMs
- CRYSTA-Apex V - 500, 700, & 900 Series
- CRYSTA-Apex V - 1200, 1600 & 2000 Series
- CRYSTA-Apex EX Series for REVO
- STRATO-Active Series
- STRATO-Apex - 500, 700, & 900 Series
- STRATO-Apex - 1600 Series
- LEGEX Series
- Styli
- Styli Kits
- Straight Styli
- Diamond Coated Styli
- Master Ball
- Machine Tool Styli
- Star Styli
- Styli for Star Styli
- Cylinder Styli
- Disk Styli
- Tip Styli
- Extensions
- Holders
- Adapters
- Joints
- Screws for Cubes
- Tools
- StyliCleaner
- Fixtures and Loading Systems
- Standard Fixturing Kits
- Eco-Fix Kits
- Custom Fixtures from MGT
- Custom Loading Systems from MGT
- 3D CNC Vision Systems
- Quick Vision ACTIVE
- Quick Vision APEX / HYPER
- Quick Vision ACCEL
- Quick Vision ULTRA
- Measuring Projectors
- PJ Series
- PV Series
- PH Series
- M2 Software
- Data Processing Unit
- Edge Detection Sensor
- Accessories
- Measuring Microscopes
- TM Series Gen. B
- MF Series Gen. D
- MF-U Series Gen. D
- Illumination Sources
- Vision Unit
- QSPAK-VUE Software
- Objective Lenses
- ML-Series Objectives
- Brightfield Observation Objectives
- Brightfield/Darkfield Observation Objectives
- NIR Objectives
- NIR LCD Objectives
- NUV Objectives
- NUV LCD Objectives
- UV Objectives
- UV LCD Objectives
- Surface Roughness
- Surftest SJ-220
- Surftest SJ-310
- Surftest SJ-410
- Surftest SJ-500
- Surftest SJ-500P
- Surftest SV-2100P
- Formtracer Avant FTA-S3000
- Surftest Extreme SV-3000CNC
- Surftest Extreme SV-M3000CNC
- Surface Roughness & Contour
- Formtracer Avant FTA-D3000 / FTA-D4000 Series
- Formtracer CS-3300
- Formtracer Extreme SV-C4500CNC
- Formtracer Extreme SV-C4500CNC HYBRID Type 1
- Formtracer Extreme CS-5000CNC and CS-H5000CNC
- Portable Hardness Testers
- Impact Type Hardness Testing Unit HARDMATIC HH-411
- Digital and Analogue Durometers HARDMATIC HH-300
- Rockwell Testers
- Rockwell HR-200/300/400
- Rockwell, Rockwell Superficial, Brinell Hardness Tester HR-530 and HR-600
- Rockwell Automatic Hardness Testing HR-600
- Automatic Vickers Testers
- Automatic Micro-Vickers hardness testing systems
- Automatic Vickers hardness testing systems
- Reference materials and indenters
- Hardness reference materials
- Hardness indenters and replacement balls
- Linear Gauges
- ABSOLUTE Digimatic Linear Gauge LGS Series
- Air Drive Unit
- Standard Linear Gauge LGF Series
- Linear Gauge LG100 Series
- Linear Gauge LG200 Series
- Laser Hologauge
- Counters and Display Units
- EJ Counter and Interfaces for Linear Gauges
- EC Counter for Linear Gauges
- EG Counter for Linear Gauges
- EB Counter for Linear Gauges
- EH Counter for Linear Gauges
- EV Counter for Linear Gauges
- Display Unit for EV Counter
- Laser Scan Micrometers
- Laser Scan Micrometer Measuring Unit and Display Unit Package
- Laser Scan Micrometer Measuring Unit
- Laser Scan Micrometer
- Laser Scan Micrometer Display Unit
- Laser Scan Micrometer Optional Accessories
- DRO Linear Scales and Counters
- DRO Linear Scales AT103
- DRO Linear Scales AT103 - High Accuracy
- DRO Linear Scales AT113
- DRO Linear Scales AT113 - High Accuracy
- DRO Linear Scales AT116
- DRO ABS Linear Scales AT715
- Universal DRO KA-200 Counter
- NC Linear Scales
- NC Linear Scales ST36
- NC Linear Scales ST46-EZA
- NC Linear Scales ABS ST700
- NC Linear Scales ABS ST1300
- NC Linear Scales AT211
- NC Linear Scales ABS AT1100
- NC Linear Scales ABS AT1300
- Scale Units
- Horizontal ABSOLUTE Scale Coolant Proof IP66
- Horizontal ABSOLUTE Scale Standard
- Horizontal ABSOLUTE Scale Measurement Direction Switching
- Horizontal ABSOLUTE Scale Diameter Function
- Vertical ABSOLUTE Scale Standard
- Vertical ABSOLUTE Scale Measurement Direction Switching
- Vertical ABSOLUTE Scale Diameter Function
- Signal Cables
- USB Input Tool Direct (Digimatic-USB Cable)
- Digimatic Data Cables
- Digimatic Extension Cables
- Wireless Communication
- Wireless Communication System U-WAVE
- U-WAVE Bluetooth
- U-WAVE-T Connection Cables and Connection Units
- Interfaces
- USB Input Tool
- DMT-3T / FS2 USB
- DMX-1 USB
- DMX-2 S
- DMX-2 USB
- DMX-3 USB
- MUX-10F
- DMX-8/2
- DMX-16 / DMX-16C
- DMX-0-1 USB / DMX-3-2 USB
- Digimatic Interface MIG
 Aerospace
Complex aerospace applications need fast, extremely precise quality control to ensure accurate assemblies. See how Mitutoyo makes it happen
 Automotive
The automotive industry continues to innovate, and Mitutoyo delivers the advanced inspection and scanning capabilities to help manufacturers achieve ongoing production
 Energy
Mitutoyo’s measurement and analysis solutions are designed to help energy providers improve reliability and increase equipment uptime.
 Medical
To protect patient well-being, medical applications require exceptional accuracy. See how extensively tested solutions from Mitutoyo can help you achieve it.
 Electronics
The non-contact and vision measurement solutions from Mitutoyo bring microscopic accuracy to smaller and denser electronic components
 Original Equipment Manufacturers
Mitutoyo OEM can address missing expertise or resources by supplying you with our renowned Metrology equipment that seamlessly integrates into your products.
 UKAS Calibration
Our UKAS accredited laboratory can handle all your metrology needs.
 Subcontract Measurement
A full range of subcontract measurement, reporting and programming services.
 Training
Specialist in-house and on-site courses covering all types of metrology.
 Repairs & Spare Parts
Dedicated in-house repairs workshop and spare part service.
 IT Support
Perfect and hassle-free installation and integration into your IT infrastructure.
 FREE Education Pack
A range of education literature designed to serve as convenient references to dimensional metrology.
 Metrology Handbook
Aimed at anyone interested in gaining an understanding of the fundamentals of dimensional metrology.
 E-Learning
For those interested in metrology, Mitutoyo offers E-Learning courses to help train students, staff, or even hobbyists.
 Mitutoyo Worldwide
The world's biggest metrology company
 Mitutoyo in the UK
Mitutoyo have four facilities offering a wide range of services in the UK.
 EKO House
An important key to understanding Mitutoyo's company philosophy is the EKO house donated by company founder Yehan Numata.
 Promotions & Discounts
Discover the latest product and service promotional deals and discounts available.
 Case Studies
For an overview of Mitutoyo's capabilities, take a to look over our collection of case studies.
 Newsletter
Sign up to our eNewsletter and you could win a Metrology Pack!
 Product Catalogue
View our extensive product range in our online UK catalogue.
 Software & Updates
Download our software and updates easily and conveniently. (EU website )🇪🇺
 Declarations of Conformity
Here you can download the full versions for the EU and the UK.
 Virtual Showroom
Experience our interactive virtual showroom.
 Newsletter
Sign up to our eNewsletter and you could win a Metrology Pack!
-
Products
- Back Products
- Products
-
Small Tools
- Back Small Tools All Small Tools
- Calipers
-
Micrometers & Micrometer Heads
- Back Micrometers & Micrometer Heads Micrometers & Micrometer Heads
- Digital & Mechanical Micrometers
- Micrometer Accessories
- Micrometer Heads
- Micrometer Head Accessories
-
Inside Measuring Instruments
- Back Inside Measuring Instruments Inside Measuring Instruments
- Inside Micrometers
- Bore Gauges
- Inside Micrometer & Bore Gauge Accessories
-
Depth Measuring Instruments
- Back Depth Measuring Instruments Depth Measuring Instruments
- Depth Micrometers
- Depth Calipers & Gauges
- Depth Caliper Accessories
- Height Gauges
- Indicators & Caliper Gauges
-
Calibration Instruments
- Back Calibration Instruments Calibration Instruments
- Height Masters
- Check Masters
- Calibration Tools
- Gauge Blocks
- Auxiliary Equipment
-
CMM
- Back CMM All CMM
- Small & Medium sized CMMs
-
Large sized CMMs
- Back Large sized CMMs Large sized CMMs
- CARB-Series
-
In-line & Shopfloor CMMs
- Back In-line & Shopfloor CMMs In-line & Shopfloor CMMs
- MACH Ko-ga-me
- MACH 3A 653
- MACH V 9106
- MiSTAR 555
- Probes
- Styli
-
Enclosures
- Back Enclosures Enclosures
- CMM Enclosures
-
CMM Software
- Back CMM Software CMM Software
- MiCAT Planner
- MCOSMOS
- MAFIS Express
- MSURF
-
Fixtures and Loading Systems
- Back Fixtures and Loading Systems Fixtures and Loading Systems
- Standard Fixturing Kits
- Eco-Fix Kits
- Custom Fixtures from MGT
- Custom Loading Systems from MGT
-
Accessories
- Back Accessories Accessories
- CMM Verification Artefact
- CMM Monitor Stand
-
Vision
- Back Vision All Vision
-
Manual 2D Vision Systems
- Back Manual 2D Vision Systems Manual 2D Vision Systems
- Quick Image
- Quick Image Software
-
Manual 3D Vision Systems
- Back Manual 3D Vision Systems Manual 3D Vision Systems
- Manual Quick Scope
- Quick Scope Software
-
3D CNC Vision Systems
- Back 3D CNC Vision Systems 3D CNC Vision Systems
- Quick Vision ACTIVE
- Quick Vision APEX / HYPER
- Quick Vision ACCEL
- Quick Vision ULTRA
-
3D CNC Multi-sensor Vision Systems
- Back 3D CNC Multi-sensor Vision Systems 3D CNC Multi-sensor Vision Systems
- Quick Vision Hybrid
- Quick Vision WLI
-
MiSCAN Vision Systems
- Back MiSCAN Vision Systems MiSCAN Vision Systems
- MiSCAN APEX 404
- MiSCAN HYPER 302
- MiSCAN HYPER 404
-
3D CNC Micro Geometry Vision Systems
- Back 3D CNC Micro Geometry Vision Systems 3D CNC Micro Geometry Vision Systems
- UMAP Vision Systems
- UMAP Software
- Vision System Software
- Vision System Accessories
-
Optical
- Back Optical All Optical
-
Magnifiers
- Back Magnifiers Magnifiers
- Pocket Comparator
- Clear Loupes
-
Measuring Projectors
- Back Measuring Projectors Measuring Projectors
- PJ Series
- PV Series
- PH Series
- M2 Software
- Data Processing Unit
- Edge Detection Sensor
- Accessories
- Measuring Microscopes
-
Microscope Units
- Back Microscope Units Microscope Units
- Microscope Unit FS70 Series
- Video Microscope Unit VMU Series
- Objective Lenses
- TAGLENS
- Illumination Units
- Form
-
Hardness
- Back Hardness All Hardness
- Portable Hardness Testers
- Rockwell Testers
-
Vickers Testers
- Back Vickers Testers Vickers Testers
- Vickers Hardness Testing Machine HV-110/120
- Automatic Vickers Testers
-
Micro-Vickers Testers
- Back Micro-Vickers Testers Micro-Vickers Testers
- Micro-Vickers Hardness Testing Machines HM-210/220
-
Hardness Testing Software
- Back Hardness Testing Software Hardness Testing Software
- AVPAK
-
Reference materials and indenters
- Back Reference materials and indenters Reference materials and indenters
- Hardness reference materials
- Hardness indenters and replacement balls
- Sensors
-
Digital Scales
- Back Digital Scales All Digital Scales
- DRO Linear Scales and Counters
- NC Linear Scales
-
Scale Units
- Back Scale Units Scale Units
- Horizontal ABSOLUTE Scale Coolant Proof IP66
- Horizontal ABSOLUTE Scale Standard
- Horizontal ABSOLUTE Scale Measurement Direction Switching
- Horizontal ABSOLUTE Scale Diameter Function
- Vertical ABSOLUTE Scale Standard
- Vertical ABSOLUTE Scale Measurement Direction Switching
- Vertical ABSOLUTE Scale Diameter Function
-
Data Management
- Back Data Management All Data Management
-
Data Management Software
- Back Data Management Software Data Management Software
- MeasurLink 10
- USB-ITPAK
-
Mini Processors
- Back Mini Processors Mini Processors
- Digimatic Mini Processor DP-1VA LOGGER
- Signal Cables
- Wireless Communication
- Interfaces
-
Timerbox, Digimatic Switch Box, Tolerance Box
- Back Timerbox, Digimatic Switch Box, Tolerance Box Timerbox, Digimatic Switch Box, Tolerance Box
- Digimatic Timerbox
- Digimatic Data Logger
- Digimatic Switch Box
- Digimatic Tolerance Box
-
Software
- Back Software All Software
-
CMM Software
- Back CMM Software CMM Software
- MiCAT Planner
- MCOSMOS
- MAFIS-Express
- MSURF
- Vision System Software
-
Form Software
- Back Form Software Form Software
- Formtracepak
- Roundpak
- Hardness Testing Software
- Sensor Management Software
-
Data Management Software
- Back Data Management Software Data Management Software
- Measurlink 10
- USB-ITPAK
- Bespoke
- Industries
-
Services
- Back Services
- Services
-
Bespoke Solutions
- Back Bespoke Solutions
- Bespoke Solutions
- UKAS Calibration
-
Subcontract Measurement
- Back Subcontract Measurement
- Subcontract Measurement
- Training
- Repairs & Spare Parts
- IT Support
- Support
- Education
-
Corporate
- Back Corporate
- Corporate
-
Mitutoyo Worldwide
- Back Mitutoyo Worldwide
- Mitutoyo Worldwide
- Name & Philosophy
- Factory Tours
- Mitutoyo Corporation
-
Mitutoyo History
- Back Mitutoyo History
- Mitutoyo History
- Mitutoyo in Europe
- Global Gateway
-
Mitutoyo in the UK
- Back Mitutoyo in the UK
- Mitutoyo in the UK
- Job Opportunities
- Certifications & Accreditations
- Sustainability
- EKO House
-
News
- Back News
- News
-
Events & Exhibitions
- Back Events & Exhibitions
- Events & Exhibitions
-
Promotions & Discounts
- Back Promotions & Discounts
- Promotions & Discounts
- Case Studies
- Newsletter
-
Resources
- Back Resources
- Resources
-
Product Literature
- Back Product Literature
- Product Literature
- Product Catalogue
- Software & Updates
- Declarations of Conformity
- Virtual Showroom
- Newsletter
A significant increase of its measuring throughput is what a manufacturer of stamped and stamped bent parts, and assemblies made of metal and plastic has achieved by investing in a sophisticated automation solution from KOMEG, a subsidiary of the Japanese premium measuring instrument manufacturer Mitutoyo.
Text and photos: Thomas Mendle, Mitutoyo Europe GmbH
Automated measurement solution: Idle times reduced by up to 80 percent
Buchen im Odenwald, Germany, February 2019. Drastically accelerated and intensified quality inspection is now possible for the family-owned company SCHEUERMANN + HEILIG GmbH from Buchen im Odenwald, Germany. Operating in Germany and Brazil, the specialist for metal and plastic forming solutions has focused on the development and series production of stamped and stamped-bent parts, technical springs and complete hybrid assemblies. With its products, SCHEUERMANN + HEILIG supplies major customers from the fields of medical technology, automotive, electrical engineering, and smart solutions, as well as, environmental and building technology.
In order to keep pace with the growing demands on its products and the increasing demands of its customers, the manufacturer decided to invest in its measuring technology and thus raise its quality inspection to an even higher level. On top of that, the management aimed to increase the measurement throughput without additional personnel costs.
For decades, the metal and plastics experts have relied on the measuring instruments of the Japanese length measuring technology manufacturer Mitutoyo for their quality, accuracy and longevity. In addition to countless manual measuring instruments such as callipers, micrometres, dial gauges and bore gauges, SCHEUERMANN + HEILIG also uses large measuring instruments from the Japanese manufacturer. These include, for example, numerous profile projectors and two Crysta-Apex S 574 and 776 coordinate measuring machines.
Based on the positive experience, the decision in favour of a Mitutoyo measuring solution was obvious. The order went to Mitutoyo's subsidiary KOMEG from Völklingen in Saarland, Germany, which specialises in the development, planning and installation of customer-specific measurement solutions.
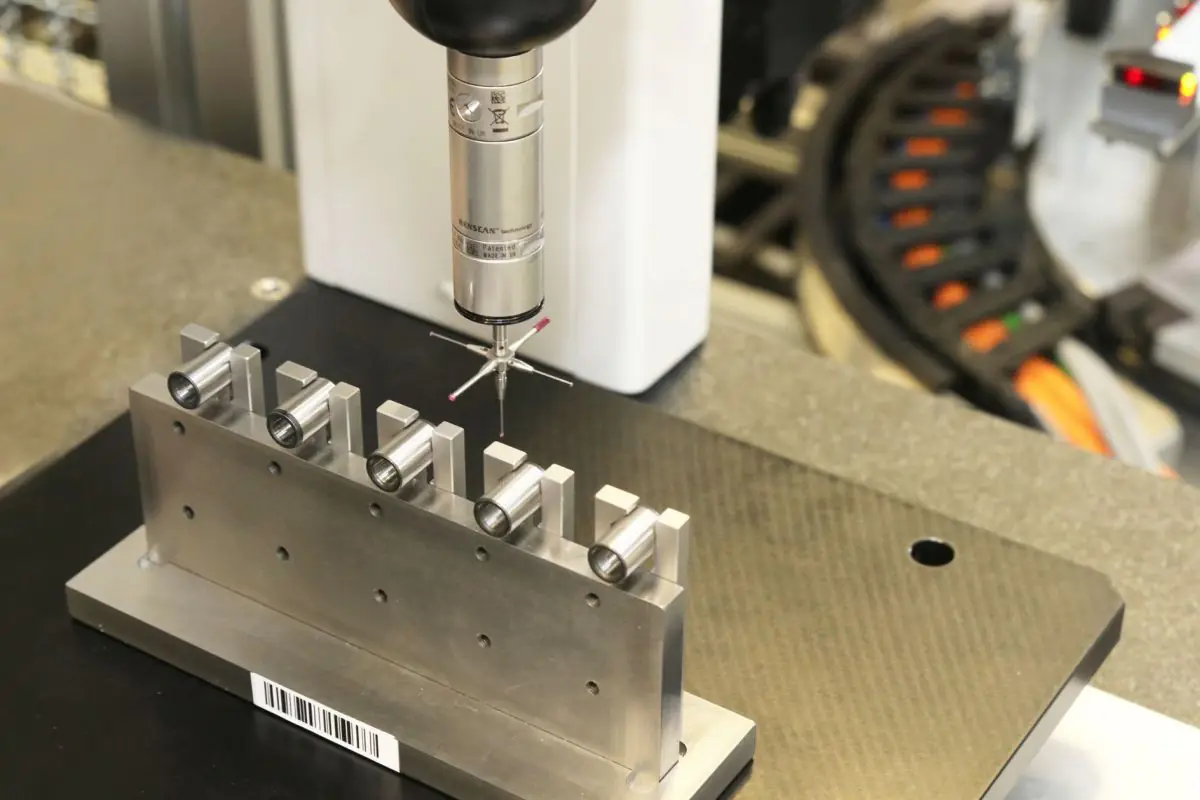
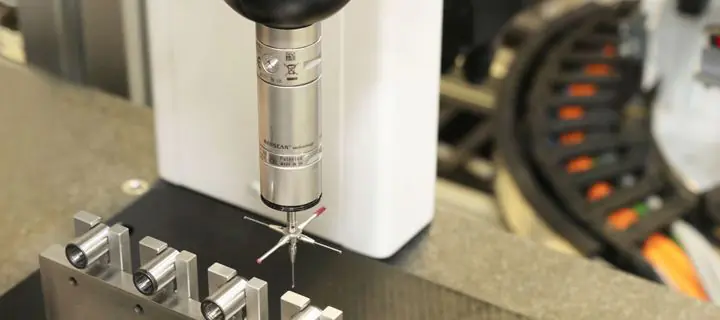
The Mitutoyo Crysta-Apex S 574 CNC coordinate measuring machine with a measuring range of (X x Y x Z) 500 x 700 x 400 millimetres and a touch-trigger measuring head had already proven to be ideal for the components to be inspected. Thanks to the integrated temperature compensation function of 16 to 26 degrees, vibration damping and high travel speed, the Crysta-Apex S is predestined for use in production environments. The measurement uncertainty of only 1.7+3L/1000 µm (18-22 degrees) guarantees extremely precise results.
Consequently, KOMEG's concept included two "574s", each equipped with two probe change racks which are alternatingly loaded by robots. The custom solution also includes a shelving system in which up to 50 pallets with clamping devices and workpieces can be stored until they are inspected.
Workpieces of various types and dimensions are inspected in the measuring cell. “Their size ranges from around 5 millimetres to roughly the size of a beverage can", says Patrick-Peter Gauer, Project Manager at KOMEG.
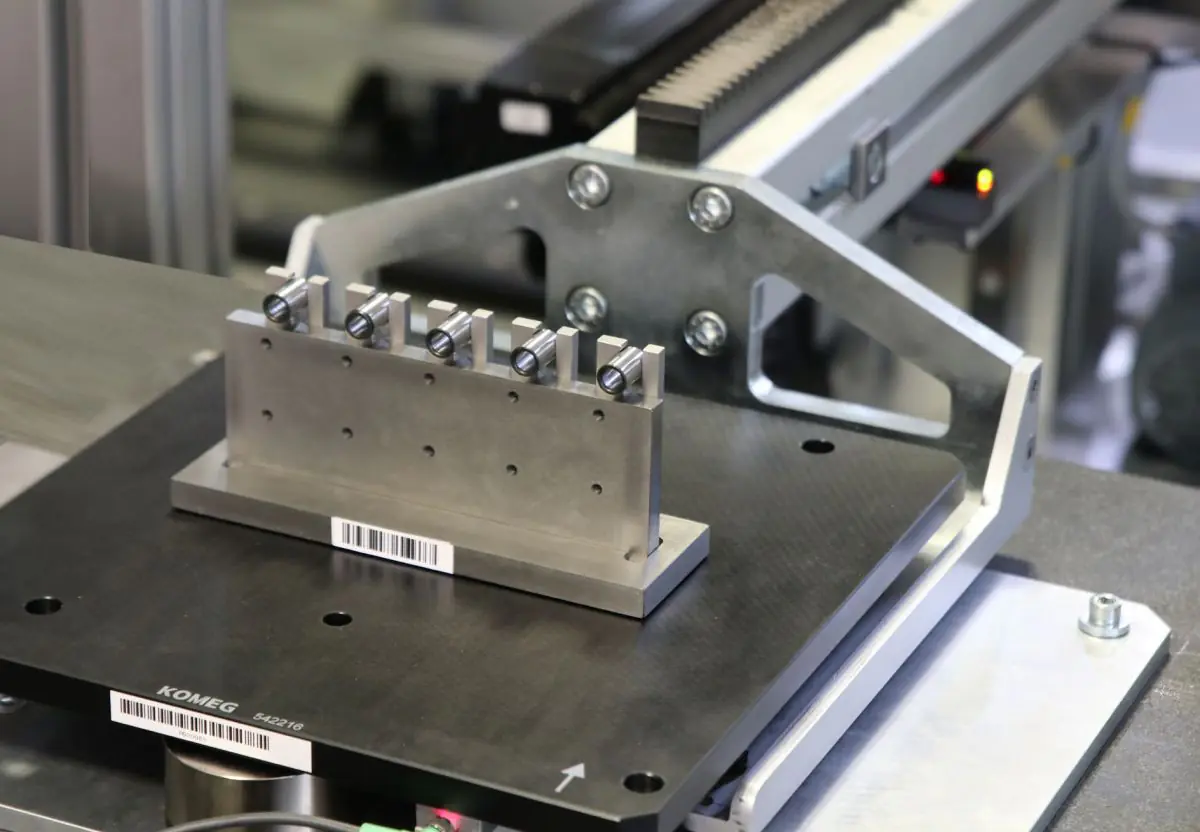
"Compared to the manual loading of the coordinate measuring machines, the automation solution saves a lot of time and effort. The idle times of the CMMs alone have been reduced by up to 80 per cent", explains Gauer.
Samples are taken and measured from each production machine in the plant at product-specific intervals. The operator positions the sample on a pallet with a clamping device specially manufactured for the respective workpiece.
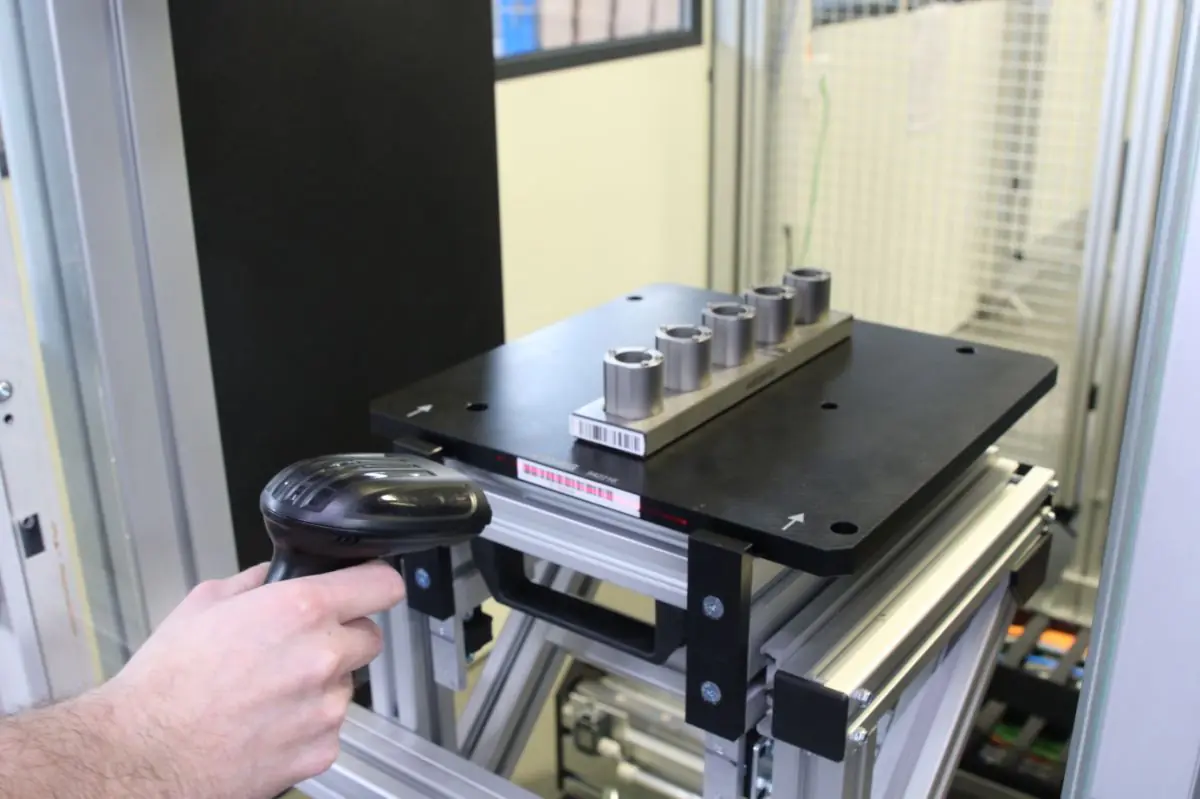
Both the clamping device and the pallet are provided with a barcode. By scanning the barcodes, the pallet and clamping device can be "married" and, if necessary, separated again after the measuring process.
After logging on to the central computer of the system using a personalised data chip or password, the operator scans the barcode printed on the order card, places the pallet in the I/O station of the cell and registers the order with the system by scanning the pallet barcode. The robot transports the pallet to one of the 50 rack positions in the cell and feeds the two coordinate measuring machines alternately with the orders that are further along in the sequence.
A third-party software specially adapted to this measuring solution for KOMEG controls all measuring processes. The program ranks new orders at the end of the loop. On a large, widely visible screen, the measuring sequence can be read off based on the operator's name as well as the batch and part number. The display colour on the screen indicates which measuring task is finished (green), which task is in progress (yellow), and which ones are still in the queue (white).
The software also allows rules to be set. For example, certain workpieces can generally be processed preferentially, or orders from certain machines or employees can be moved up in the loop by default. In addition, the operator (depending on the authorization) can manually move a newly entered task up in the queue if a quick measurement is required.
Reading the barcode on the clamping device assigns the corresponding part program for the coordinate measuring machine to the job. It is executed automatically after the robot has loaded the pallet onto the pallet holder mounted on the granite plate of the CMM.
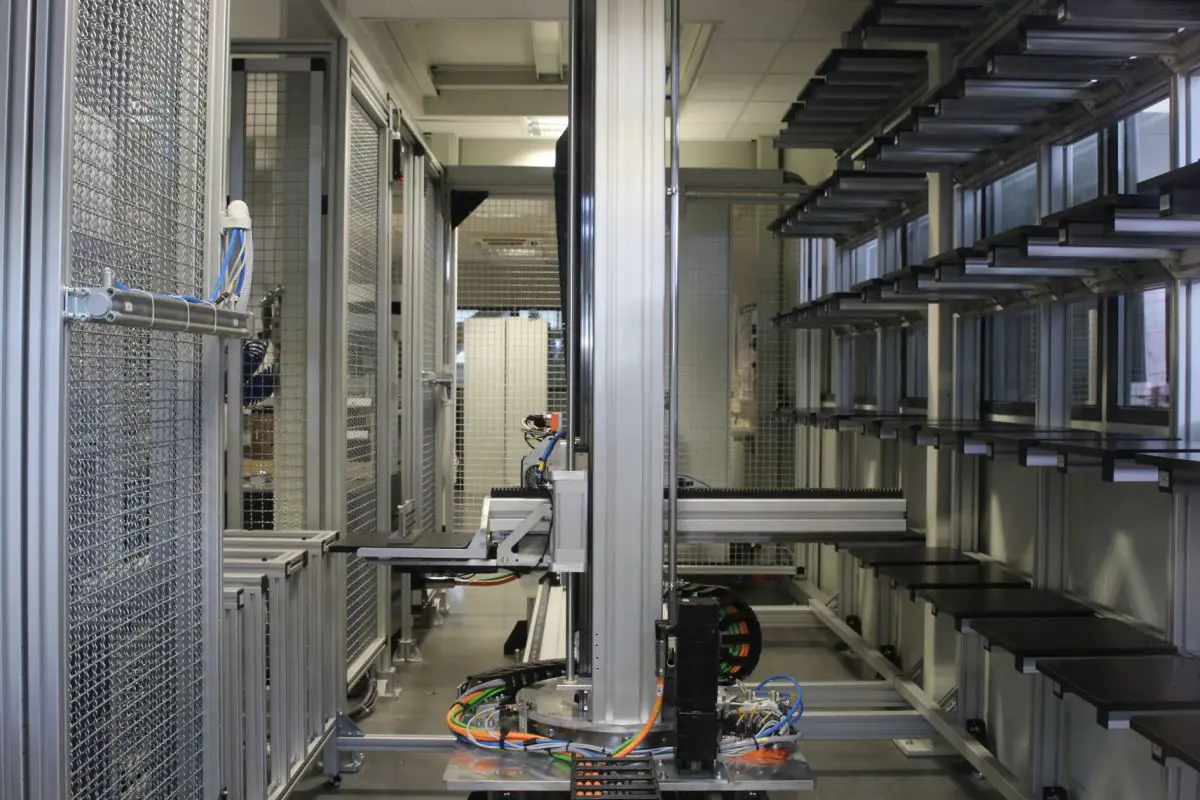
Once the measurement has been completed, the operator has the choice of having the workpiece output at the I/O station or repeating the measurement. It is also possible to print a measurement protocol and to store and evaluate the data in the CAQ system.
Nonetheless, KOMEG's custom solution not only drastically accelerates and simplifies SCHEUERMANN + HEILIG's quality inspection, but it also offers further advantages. The measuring system can run overnight and thus process measurement orders accumulated during the day. The two Crysta-Apex S machines can then complete their qualification cycles without any further involvement by an operator.
The trendsetting measuring system could as well be used in various configurations in other industries", says Patrick-Peter Gauer with confidence "since efficient quality assurance is becoming more and more important across all sectors".


