- Nederlands, Belgique / België
- Česky, Česká republika
- Deutsch, Deutschland
- Español, España
- Português, Portugal
- English, Europe
- Français, France
- Italiano, Italia
- Magyar, Magyarország
- Nederlands, Nederland
- Deutsch, Österreich
- Polski, Polska
- Română, România
- Français / Deutsch, Suisse / Schweiz
- Svenska, Sverige
- Suomeksi, Suomi
- Türkçe, Türkiye
- English, United Kingdom
- Slovenská, Slovak
-
Worldwide
- All Small Tools
- Calipers
- Micrometers & Micrometer Heads
- Inside Measuring Instruments
- Depth Measuring Instruments
- Height Gauges
- Indicators & Caliper Gauges
- Calibration Instruments
- Gauge Blocks
- Auxiliary Equipment
- All CMM
- Small & Medium sized CMMs
- Large sized CMMs
- In-line & Shopfloor CMMs
- Probes
- Styli
- Enclosures
- CMM Software
- Fixtures and Loading Systems
- Accessories
- All Vision
- Manual 2D Vision Systems
- Manual 3D Vision Systems
- 3D CNC Vision Systems
- 3D CNC Multi-sensor Vision Systems
- MiSCAN Vision Systems
- 3D CNC Micro Geometry Vision Systems
- Vision System Software
- Vision System Accessories
- All Optical
- Magnifiers
- Measuring Projectors
- Measuring Microscopes
- Microscope Units
- Objective Lenses
- TAGLENS
- Illumination Units
- All Hardness
- Portable Hardness Testers
- Rockwell Testers
- Vickers Testers
- Automatic Vickers Testers
- Micro-Vickers Testers
- Hardness Testing Software
- Reference materials and indenters
- All Sensors
- Linear Gauges
- Low Force Gauges
- Counters and Display Units
- Laser Scan Micrometers
- Surface Measure
- Sensor Management Software
- All Data Management
- Data Management Software
- Mini Processors
- Signal Cables
- Wireless Communication
- Interfaces
- Timerbox, Digimatic Switch Box, Tolerance Box
- Micrometers & Micrometer Heads
- Digital & Mechanical Micrometers
- Micrometer Accessories
- Micrometer Heads
- Micrometer Head Accessories
- Inside Measuring Instruments
- Inside Micrometers
- Bore Gauges
- Inside Micrometer & Bore Gauge Accessories
- Indicators & Caliper Gauges
- Digital Indicators
- Indicator Accessories
- Lever Indicators
- Dial Indicators
- Dial Test Indicators Accessories
- Thickness, Caliper & Tension Gauges
- Gauge Blocks
- Steel Gauge Block Sets
- Steel Individual Gauge Blocks
- Ceramic Gauge Block Sets
- Ceramic Individual Gauge Blocks
- Special Gauge Blocks
- Gauge Block Accessories
- Small & Medium sized CMMs
- CRYSTA-Apex V - 500, 700, & 900 Series
- CRYSTA-Apex V - 1200, 1600 & 2000 Series
- CRYSTA-Apex EX Series for REVO
- STRATO-Active Series
- STRATO-Apex - 500, 700, & 900 Series
- STRATO-Apex - 1600 Series
- LEGEX Series
- Styli
- Styli Kits
- Straight Styli
- Diamond Coated Styli
- Master Ball
- Machine Tool Styli
- Star Styli
- Styli for Star Styli
- Cylinder Styli
- Disk Styli
- Tip Styli
- Extensions
- Holders
- Adapters
- Joints
- Screws for Cubes
- Tools
- StyliCleaner
- Fixtures and Loading Systems
- Standard Fixturing Kits
- Eco-Fix Kits
- Custom Fixtures from MGT
- Custom Loading Systems from MGT
- 3D CNC Vision Systems
- Quick Vision ACTIVE
- Quick Vision APEX / HYPER
- Quick Vision ACCEL
- Quick Vision ULTRA
- Measuring Projectors
- PJ Series
- PV Series
- PH Series
- M2 Software
- Data Processing Unit
- Edge Detection Sensor
- Accessories
- Measuring Microscopes
- TM Series Gen. B
- MF Series Gen. D
- MF-U Series Gen. D
- Illumination Sources
- Vision Unit
- QSPAK-VUE Software
- Objective Lenses
- ML-Series Objectives
- Brightfield Observation Objectives
- Brightfield/Darkfield Observation Objectives
- NIR Objectives
- NIR LCD Objectives
- NUV Objectives
- NUV LCD Objectives
- UV Objectives
- UV LCD Objectives
- Surface Roughness
- Surftest SJ-220
- Surftest SJ-310
- Surftest SJ-410
- Surftest SJ-500
- Surftest SJ-500P
- Surftest SV-2100P
- Formtracer Avant FTA-S3000
- Surftest Extreme SV-3000CNC
- Surftest Extreme SV-M3000CNC
- Surface Roughness & Contour
- Formtracer Avant FTA-D3000 / FTA-D4000 Series
- Formtracer CS-3300
- Formtracer Extreme SV-C4500CNC
- Formtracer Extreme SV-C4500CNC HYBRID Type 1
- Formtracer Extreme CS-5000CNC and CS-H5000CNC
- Portable Hardness Testers
- Impact Type Hardness Testing Unit HARDMATIC HH-411
- Digital and Analogue Durometers HARDMATIC HH-300
- Rockwell Testers
- Rockwell HR-200/300/400
- Rockwell, Rockwell Superficial, Brinell Hardness Tester HR-530 and HR-600
- Rockwell Automatic Hardness Testing HR-600
- Automatic Vickers Testers
- Automatic Micro-Vickers hardness testing systems
- Automatic Vickers hardness testing systems
- Reference materials and indenters
- Hardness reference materials
- Hardness indenters and replacement balls
- Linear Gauges
- ABSOLUTE Digimatic Linear Gauge LGS Series
- Air Drive Unit
- Standard Linear Gauge LGF Series
- Linear Gauge LG100 Series
- Linear Gauge LG200 Series
- Laser Hologauge
- Counters and Display Units
- EJ Counter and Interfaces for Linear Gauges
- EC Counter for Linear Gauges
- EG Counter for Linear Gauges
- EB Counter for Linear Gauges
- EH Counter for Linear Gauges
- EV Counter for Linear Gauges
- Display Unit for EV Counter
- Laser Scan Micrometers
- Laser Scan Micrometer Measuring Unit and Display Unit Package
- Laser Scan Micrometer Measuring Unit
- Laser Scan Micrometer
- Laser Scan Micrometer Display Unit
- Laser Scan Micrometer Optional Accessories
- DRO Linear Scales and Counters
- DRO Linear Scales AT103
- DRO Linear Scales AT103 - High Accuracy
- DRO Linear Scales AT113
- DRO Linear Scales AT113 - High Accuracy
- DRO Linear Scales AT116
- DRO ABS Linear Scales AT715
- Universal DRO KA-200 Counter
- NC Linear Scales
- NC Linear Scales ST36
- NC Linear Scales ST46-EZA
- NC Linear Scales ABS ST700
- NC Linear Scales ABS ST1300
- NC Linear Scales AT211
- NC Linear Scales ABS AT1100
- NC Linear Scales ABS AT1300
- Scale Units
- Horizontal ABSOLUTE Scale Coolant Proof IP66
- Horizontal ABSOLUTE Scale Standard
- Horizontal ABSOLUTE Scale Measurement Direction Switching
- Horizontal ABSOLUTE Scale Diameter Function
- Vertical ABSOLUTE Scale Standard
- Vertical ABSOLUTE Scale Measurement Direction Switching
- Vertical ABSOLUTE Scale Diameter Function
- Signal Cables
- USB Input Tool Direct (Digimatic-USB Cable)
- Digimatic Data Cables
- Digimatic Extension Cables
- Wireless Communication
- Wireless Communication System U-WAVE
- U-WAVE Bluetooth
- U-WAVE-T Connection Cables and Connection Units
- Interfaces
- USB Input Tool
- DMT-3T / FS2 USB
- DMX-1 USB
- DMX-2 S
- DMX-2 USB
- DMX-3 USB
- MUX-10F
- DMX-8/2
- DMX-16 / DMX-16C
- DMX-0-1 USB / DMX-3-2 USB
- Digimatic Interface MIG
 Aerospace
Complex aerospace applications need fast, extremely precise quality control to ensure accurate assemblies. See how Mitutoyo makes it happen
 Automotive
The automotive industry continues to innovate, and Mitutoyo delivers the advanced inspection and scanning capabilities to help manufacturers achieve ongoing production
 Energy
Mitutoyo’s measurement and analysis solutions are designed to help energy providers improve reliability and increase equipment uptime.
 Medical
To protect patient well-being, medical applications require exceptional accuracy. See how extensively tested solutions from Mitutoyo can help you achieve it.
 Electronics
The non-contact and vision measurement solutions from Mitutoyo bring microscopic accuracy to smaller and denser electronic components
 Original Equipment Manufacturers
Mitutoyo OEM can address missing expertise or resources by supplying you with our renowned Metrology equipment that seamlessly integrates into your products.
 UKAS Calibration
Our UKAS accredited laboratory can handle all your metrology needs.
 Subcontract Measurement
A full range of subcontract measurement, reporting and programming services.
 Training
Specialist in-house and on-site courses covering all types of metrology.
 Repairs & Spare Parts
Dedicated in-house repairs workshop and spare part service.
 IT Support
Perfect and hassle-free installation and integration into your IT infrastructure.
 FREE Education Pack
A range of education literature designed to serve as convenient references to dimensional metrology.
 Metrology Handbook
Aimed at anyone interested in gaining an understanding of the fundamentals of dimensional metrology.
 E-Learning
For those interested in metrology, Mitutoyo offers E-Learning courses to help train students, staff, or even hobbyists.
 Mitutoyo Worldwide
The world's biggest metrology company
 Mitutoyo in the UK
Mitutoyo have four facilities offering a wide range of services in the UK.
 EKO House
An important key to understanding Mitutoyo's company philosophy is the EKO house donated by company founder Yehan Numata.
 Promotions & Discounts
Discover the latest product and service promotional deals and discounts available.
 Case Studies
For an overview of Mitutoyo's capabilities, take a to look over our collection of case studies.
 Newsletter
Sign up to our eNewsletter and you could win a Metrology Pack!
 Product Catalogue
View our extensive product range in our online UK catalogue.
 Software & Updates
Download our software and updates easily and conveniently. (EU website )🇪🇺
 Declarations of Conformity
Here you can download the full versions for the EU and the UK.
 Virtual Showroom
Experience our interactive virtual showroom.
 Newsletter
Sign up to our eNewsletter and you could win a Metrology Pack!
-
Products
- Back Products
- Products
-
Small Tools
- Back Small Tools All Small Tools
- Calipers
-
Micrometers & Micrometer Heads
- Back Micrometers & Micrometer Heads Micrometers & Micrometer Heads
- Digital & Mechanical Micrometers
- Micrometer Accessories
- Micrometer Heads
- Micrometer Head Accessories
-
Inside Measuring Instruments
- Back Inside Measuring Instruments Inside Measuring Instruments
- Inside Micrometers
- Bore Gauges
- Inside Micrometer & Bore Gauge Accessories
-
Depth Measuring Instruments
- Back Depth Measuring Instruments Depth Measuring Instruments
- Depth Micrometers
- Depth Calipers & Gauges
- Depth Caliper Accessories
- Height Gauges
- Indicators & Caliper Gauges
-
Calibration Instruments
- Back Calibration Instruments Calibration Instruments
- Height Masters
- Check Masters
- Calibration Tools
- Gauge Blocks
- Auxiliary Equipment
-
CMM
- Back CMM All CMM
- Small & Medium sized CMMs
-
Large sized CMMs
- Back Large sized CMMs Large sized CMMs
- CARB-Series
-
In-line & Shopfloor CMMs
- Back In-line & Shopfloor CMMs In-line & Shopfloor CMMs
- MACH Ko-ga-me
- MACH 3A 653
- MACH V 9106
- MiSTAR 555
- Probes
- Styli
-
Enclosures
- Back Enclosures Enclosures
- CMM Enclosures
-
CMM Software
- Back CMM Software CMM Software
- MiCAT Planner
- MCOSMOS
- MAFIS Express
- MSURF
-
Fixtures and Loading Systems
- Back Fixtures and Loading Systems Fixtures and Loading Systems
- Standard Fixturing Kits
- Eco-Fix Kits
- Custom Fixtures from MGT
- Custom Loading Systems from MGT
-
Accessories
- Back Accessories Accessories
- CMM Verification Artefact
- CMM Monitor Stand
-
Vision
- Back Vision All Vision
-
Manual 2D Vision Systems
- Back Manual 2D Vision Systems Manual 2D Vision Systems
- Quick Image
- Quick Image Software
-
Manual 3D Vision Systems
- Back Manual 3D Vision Systems Manual 3D Vision Systems
- Manual Quick Scope
- Quick Scope Software
-
3D CNC Vision Systems
- Back 3D CNC Vision Systems 3D CNC Vision Systems
- Quick Vision ACTIVE
- Quick Vision APEX / HYPER
- Quick Vision ACCEL
- Quick Vision ULTRA
-
3D CNC Multi-sensor Vision Systems
- Back 3D CNC Multi-sensor Vision Systems 3D CNC Multi-sensor Vision Systems
- Quick Vision Hybrid
- Quick Vision WLI
-
MiSCAN Vision Systems
- Back MiSCAN Vision Systems MiSCAN Vision Systems
- MiSCAN APEX 404
- MiSCAN HYPER 302
- MiSCAN HYPER 404
-
3D CNC Micro Geometry Vision Systems
- Back 3D CNC Micro Geometry Vision Systems 3D CNC Micro Geometry Vision Systems
- UMAP Vision Systems
- UMAP Software
- Vision System Software
- Vision System Accessories
-
Optical
- Back Optical All Optical
-
Magnifiers
- Back Magnifiers Magnifiers
- Pocket Comparator
- Clear Loupes
-
Measuring Projectors
- Back Measuring Projectors Measuring Projectors
- PJ Series
- PV Series
- PH Series
- M2 Software
- Data Processing Unit
- Edge Detection Sensor
- Accessories
- Measuring Microscopes
-
Microscope Units
- Back Microscope Units Microscope Units
- Microscope Unit FS70 Series
- Video Microscope Unit VMU Series
- Objective Lenses
- TAGLENS
- Illumination Units
- Form
-
Hardness
- Back Hardness All Hardness
- Portable Hardness Testers
- Rockwell Testers
-
Vickers Testers
- Back Vickers Testers Vickers Testers
- Vickers Hardness Testing Machine HV-110/120
- Automatic Vickers Testers
-
Micro-Vickers Testers
- Back Micro-Vickers Testers Micro-Vickers Testers
- Micro-Vickers Hardness Testing Machines HM-210/220
-
Hardness Testing Software
- Back Hardness Testing Software Hardness Testing Software
- AVPAK
-
Reference materials and indenters
- Back Reference materials and indenters Reference materials and indenters
- Hardness reference materials
- Hardness indenters and replacement balls
- Sensors
-
Digital Scales
- Back Digital Scales All Digital Scales
- DRO Linear Scales and Counters
- NC Linear Scales
-
Scale Units
- Back Scale Units Scale Units
- Horizontal ABSOLUTE Scale Coolant Proof IP66
- Horizontal ABSOLUTE Scale Standard
- Horizontal ABSOLUTE Scale Measurement Direction Switching
- Horizontal ABSOLUTE Scale Diameter Function
- Vertical ABSOLUTE Scale Standard
- Vertical ABSOLUTE Scale Measurement Direction Switching
- Vertical ABSOLUTE Scale Diameter Function
-
Data Management
- Back Data Management All Data Management
-
Data Management Software
- Back Data Management Software Data Management Software
- MeasurLink 10
- USB-ITPAK
-
Mini Processors
- Back Mini Processors Mini Processors
- Digimatic Mini Processor DP-1VA LOGGER
- Signal Cables
- Wireless Communication
- Interfaces
-
Timerbox, Digimatic Switch Box, Tolerance Box
- Back Timerbox, Digimatic Switch Box, Tolerance Box Timerbox, Digimatic Switch Box, Tolerance Box
- Digimatic Timerbox
- Digimatic Data Logger
- Digimatic Switch Box
- Digimatic Tolerance Box
-
Software
- Back Software All Software
-
CMM Software
- Back CMM Software CMM Software
- MiCAT Planner
- MCOSMOS
- MAFIS-Express
- MSURF
- Vision System Software
-
Form Software
- Back Form Software Form Software
- Formtracepak
- Roundpak
- Hardness Testing Software
- Sensor Management Software
-
Data Management Software
- Back Data Management Software Data Management Software
- Measurlink 10
- USB-ITPAK
- Bespoke
- Industries
-
Services
- Back Services
- Services
-
Bespoke Solutions
- Back Bespoke Solutions
- Bespoke Solutions
- UKAS Calibration
-
Subcontract Measurement
- Back Subcontract Measurement
- Subcontract Measurement
- Training
- Repairs & Spare Parts
- IT Support
- Support
- Education
-
Corporate
- Back Corporate
- Corporate
-
Mitutoyo Worldwide
- Back Mitutoyo Worldwide
- Mitutoyo Worldwide
- Name & Philosophy
- Factory Tours
- Mitutoyo Corporation
-
Mitutoyo History
- Back Mitutoyo History
- Mitutoyo History
- Mitutoyo in Europe
- Global Gateway
-
Mitutoyo in the UK
- Back Mitutoyo in the UK
- Mitutoyo in the UK
- Job Opportunities
- Certifications & Accreditations
- Sustainability
- EKO House
-
News
- Back News
- News
-
Events & Exhibitions
- Back Events & Exhibitions
- Events & Exhibitions
-
Promotions & Discounts
- Back Promotions & Discounts
- Promotions & Discounts
- Case Studies
- Newsletter
-
Resources
- Back Resources
- Resources
-
Product Literature
- Back Product Literature
- Product Literature
- Product Catalogue
- Software & Updates
- Declarations of Conformity
- Virtual Showroom
- Newsletter
When CDK Seals won an order for the production of metal components from a new aerospace customer, the leading manufacturer of seals for the food, pharmaceutical, and petrochemical sectors had to employ new production equipment and methods.
Mitutoyo Delivers Precision for Seal Manufacturer

When CDK Seals won an order for the production of metal components from a new aerospace customer, the leading manufacturer of seals for the food, pharmaceutical and petrochemical sectors had to employ new production equipment and methods. Historically, the Yeovil manufacturer has produced its seals on specialist machines from a variety of PTFE composites, however the new £100,000+ order required a 3 part assembly with steel, ally-bronze and PTFE.
With a Doosan Lynx 220 Y-axis turning centre delivered in time for the contract to commence in April 2016, the manufacturer of piston, rod, rotary and static seals needed additional support with respect to producing and measuring the new assembly. It is here where Mitutoyo stepped into the equation.
Commenting upon winning the order and the arrival of the Doosan turning centre, Managing Director Mr Dave Paget says: "Coincidentally we ordered the Doosan before we won the order, so when the machine was delivered we needed to work out how to machine the parts and also measure the components that complete the aerospace assembly. When it came to measuring the parts, we called Mitutoyo and their engineer interrogated the part drawings and delivered a solution. It was an extremely straightforward process that was tailored to our exact demands."
With 90% of the company's seals manufactured on specialist Sealjet machinery, the machining of metal components brought a change of processes for the ISO: 9001 certified manufacturer. New to machining metallic components for customers, CDK employed Arno Cutting Tools to provide a complete tooling solution for the project whilst Trevor Stubbs from Mitutoyo conducted a complete investigation from a metrology perspective.
The three component assembly consists of both a concave and convex component as well as a housing that makes the complete assembly 80mm diameter with a 60mm height. Recalling the process of specifying Mitutoyo, Mr Paget says: "We initially looked at local metrology companies but Mitutoyo proved the most professional, comprehensive and even cost-effective solution. We already had a range of micrometers and vernier callipers from Mitutoyo and the name is synonymous with precision and quality. This was proven by the enquiry through to installation service from Trevor Stubbs."
Problem
The issue for CDK was that the 1500 assemblies with a total of 4500 parts had to be machined to a 0.03mm tolerance.
Unfortunately for CDK, its micrometers and vernier callipers couldn't measure many of the complex features, especially the curved surfaces. This situation was particularly pertinent for a 4mm diameter cross drilled hole that is positioned on one of the concave surfaces.
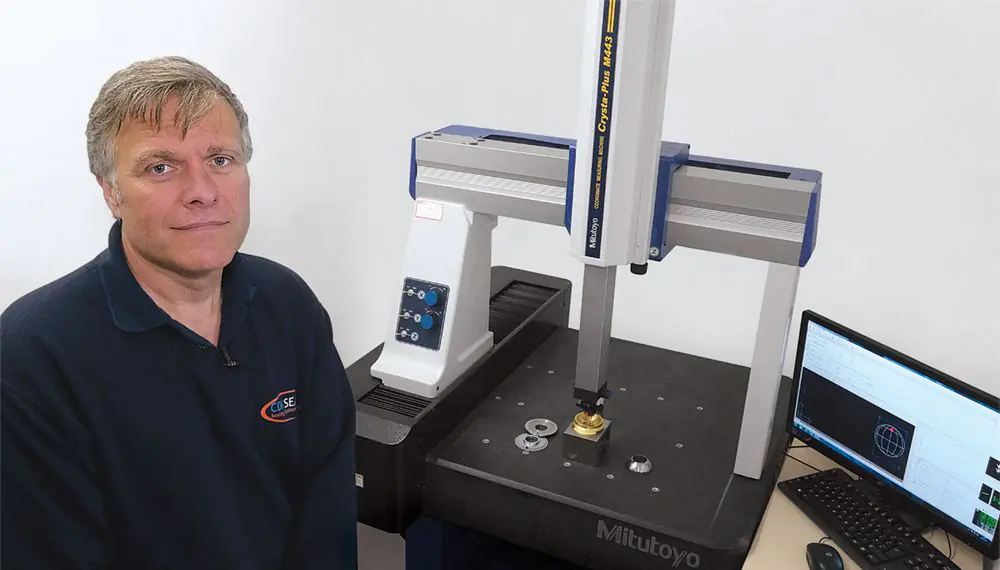
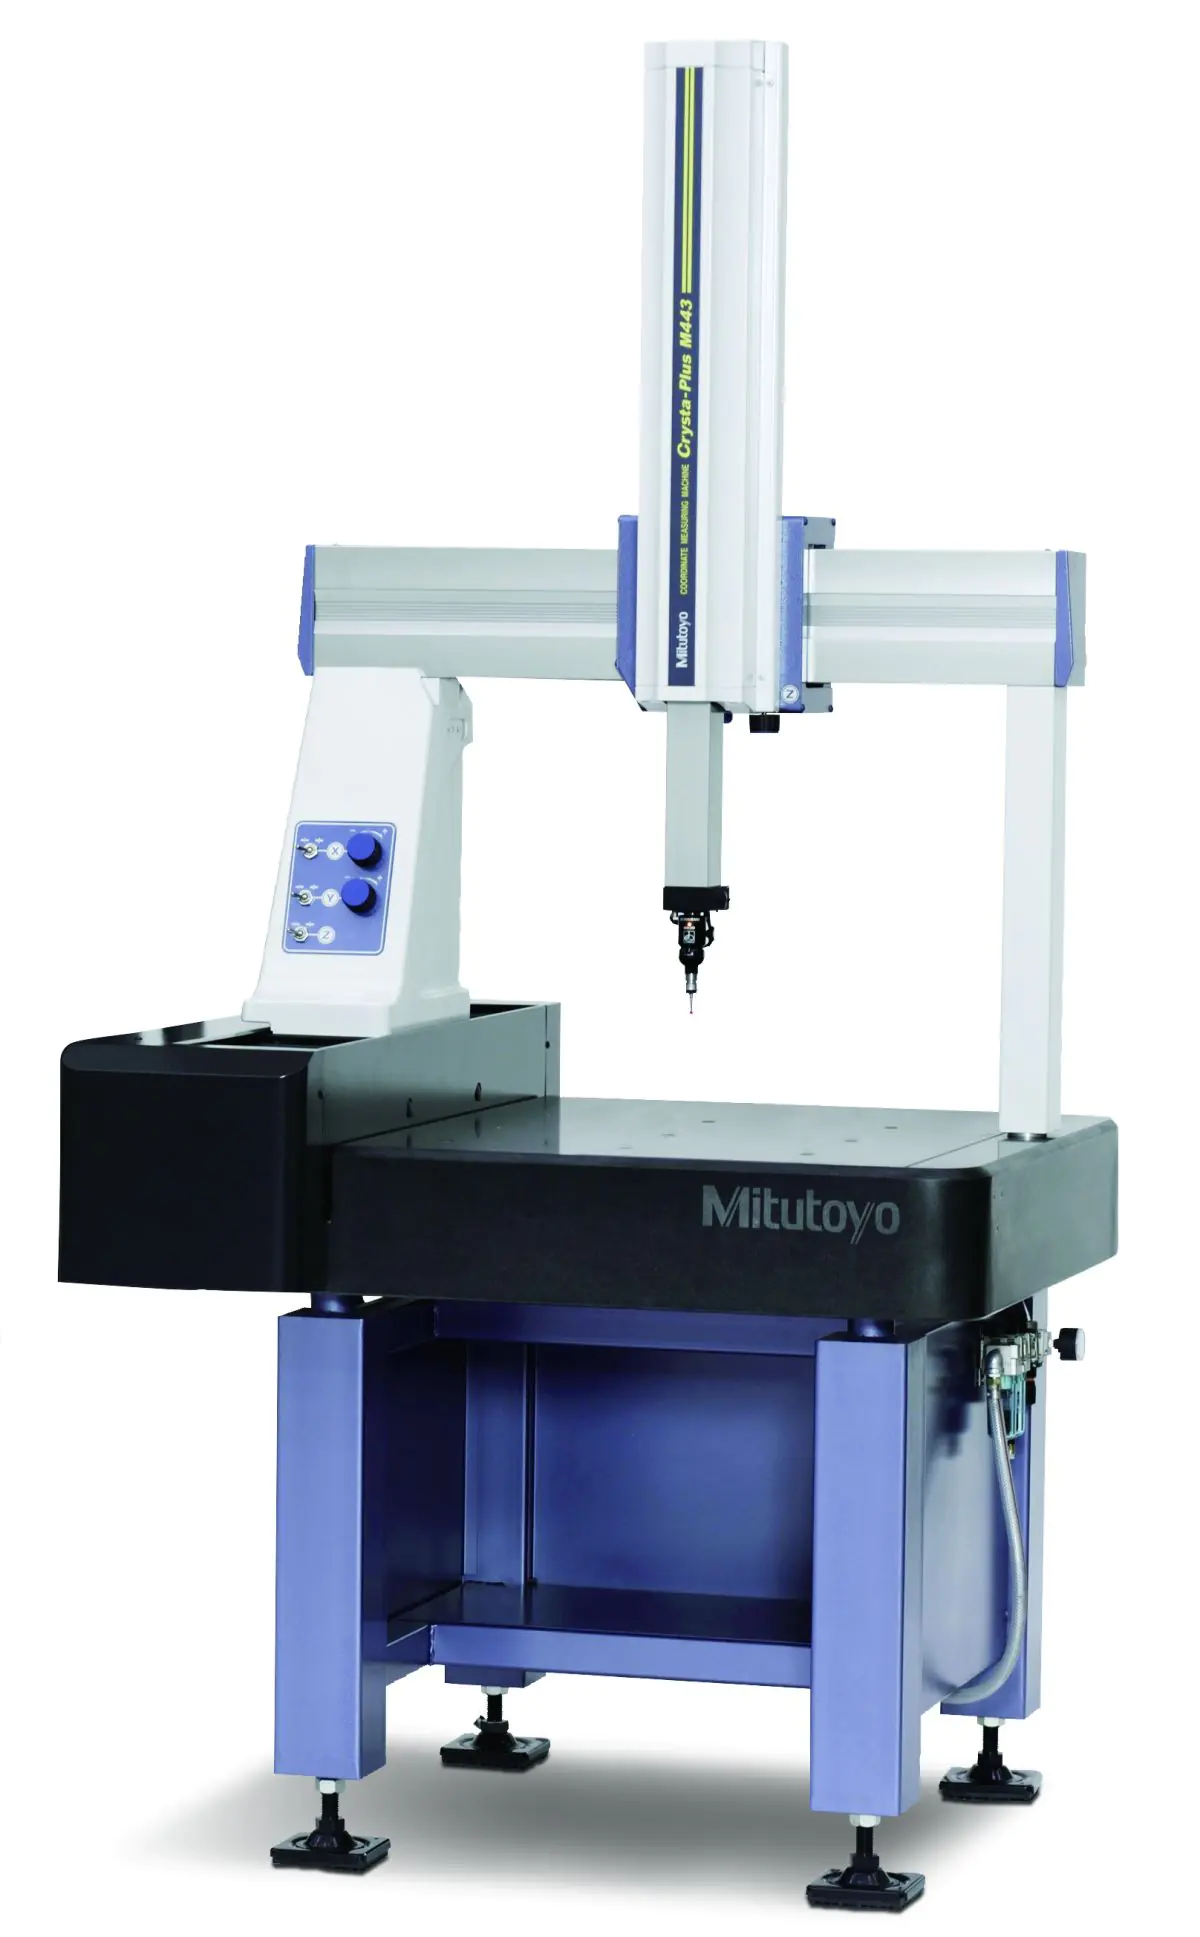
Mitutoyo invited CDK engineers to its UK headquarters in Andover to investigate the suitable options and it was agreed that the Crysta Plus M433 Co-ordinate Measuring Machine (CMM) was the ideal solution.
The cost effective and user friendly CMM with a bridge type design has a work area of 400 by 400 by 300mm with an astounding resolution of 0.0005mm. Utilising high precision linear scales and air bearings on all axes, the Crysta Plus M433 generates unparalleled precision for workshops working in average ambient temperatures from 15 to 30degrees C.
Commenting upon the Crysta Plus M433 CMM, Mr Paget says: "We agreed with Mitutoyo that the Crysta Plus was the most suitable product for measuring the highly critical parts and ordered the machine on a Thursday. It was delivered and commissioned the following Wednesday. Mitutoyo were excellent. They installed the machine and did the programming for the three seal components, so we could be instantly up and running. The training was simple and straightforward and we have the CMM networked to a PC, so we can store any subsequent programs off-line. Mitutoyo also provided a series of 3, 2 and 1mm diameter ruby probes. The small probes enable us to get inside the 4mm diameter drilled hole and check the concentricity as well as the angle of the hole that has a critical angle tolerance of +/-0.1degrees."
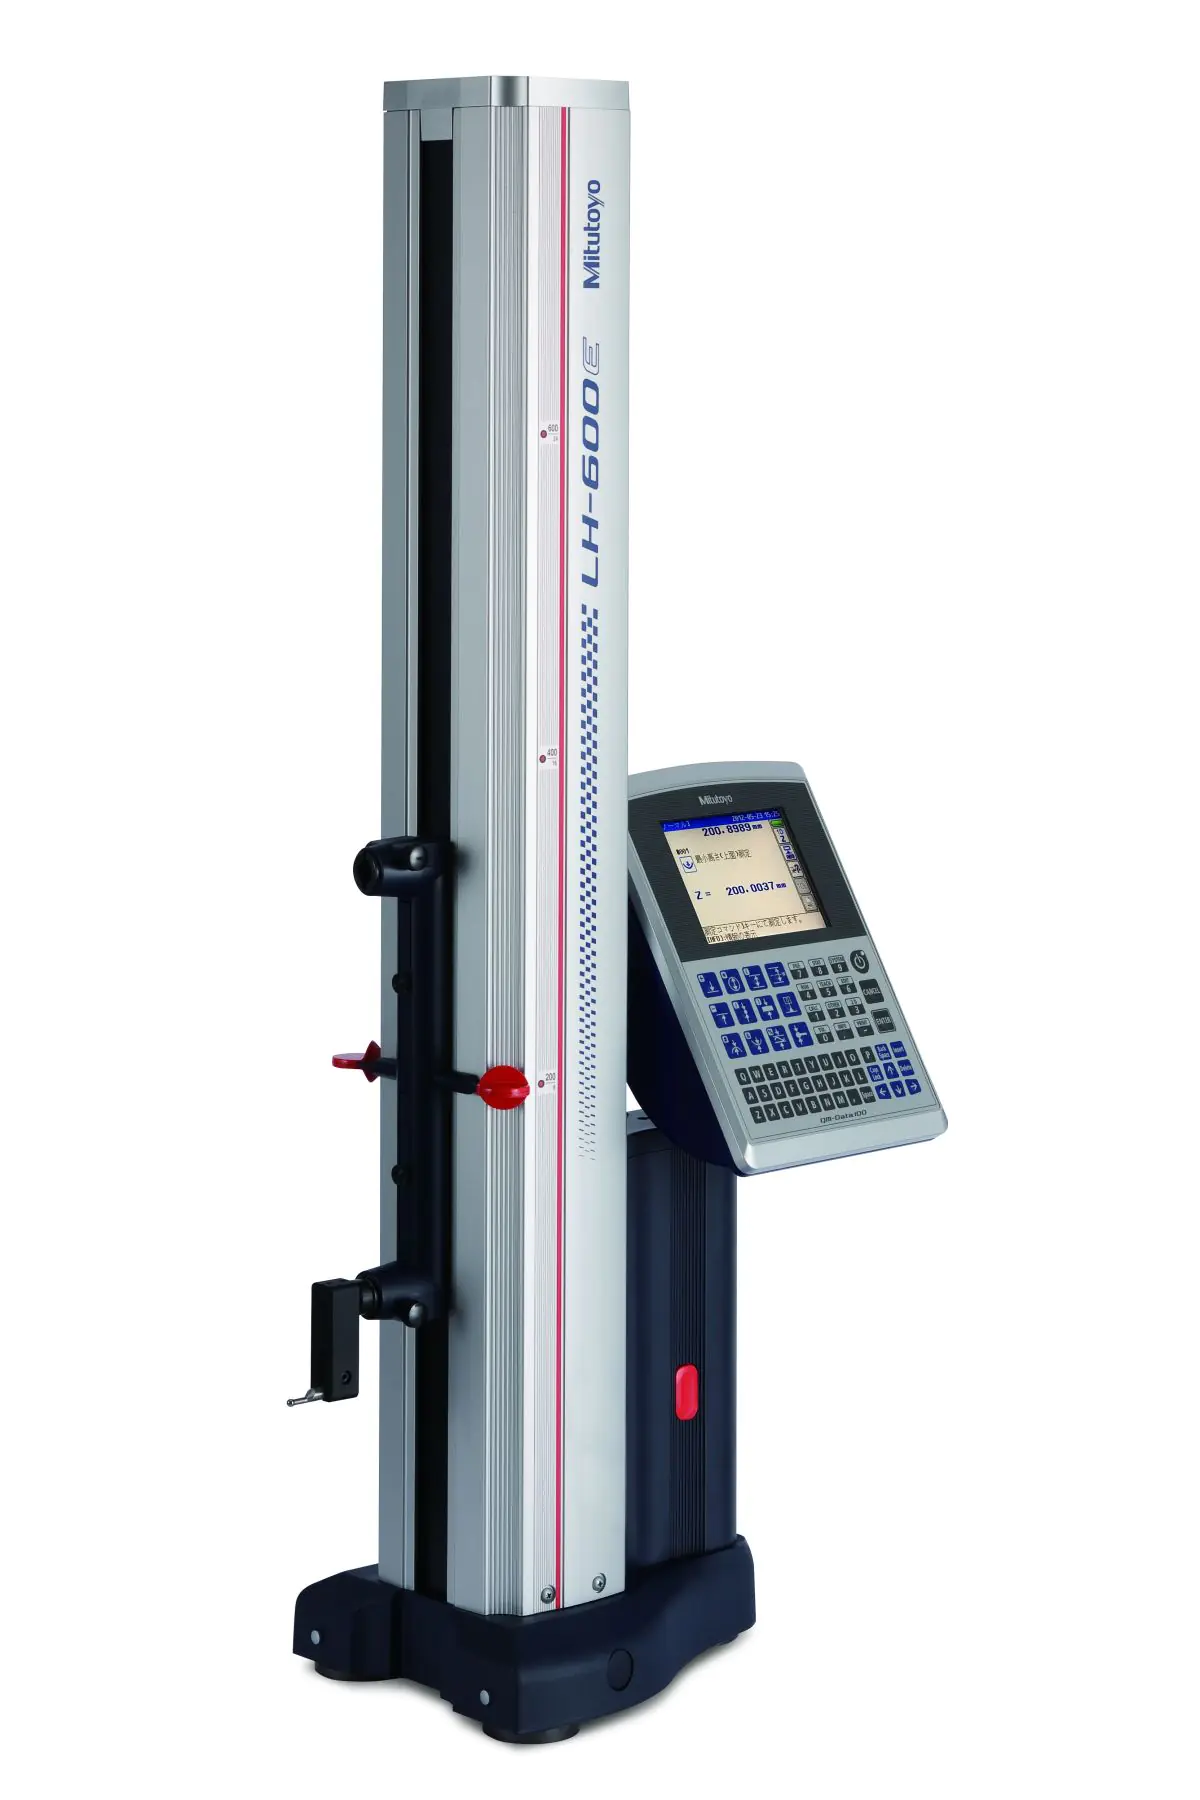
Whilst the CMM proved ideal for measuring the curved surfaces, internal holes and other critical features, it was agreed that a plate with a 60mm internal bore with a bellow moulded to it, should be measured with a digital height gauge. Again Mitutoyo had the solution with its high performance 2D linear LH600E digital height gauge. Capable of measuring components up to 600mm high with an achieved accuracy of (1.1+0.6L/600)microns, the easy to use LH600E incorporates a colour TFT LCD monitor, 2GB of USB storage and air bearings in the base unit to eliminate friction over the surface plate. The critical bore assembly has a tolerance of 60mm +0.03mm. Now, the LH600E provides complete process reliability with its ability to support quality control and statistical processing functions.

Solution
The final issue for CDK regarding the project was the surface finish on the ally-bronze parts. The friction between the mating parts would wear the surface of the parts and this had the potential to impact the performance of the assembly. To eliminate this issue, the mating parts required a surface finish better than 0.4Ra. From a production perspective, CDK invested in a vibratory bowl finishing machine from PDJ Vibro to enhance the surface finish of the parts. However, the parts still required measuring to ensure conformity to the required specifications. Once again, Mitutoyo stepped up with its Surftest SJ-210 portable surface roughness testing machine.
Capable of working independently of a mains power supply, the SJ-210 is capable of measuring almost any part of a workpiece regardless of size. With a 2.4inch LCD screen, the SJ-210 is easy to use and read. Concluding on the support from Mitutoyo, Mr Paget says: "The service and support from Mitutoyo has been outstanding. We took our project and drawings to the metrology experts and they delivered a complete and cost effective solution and they managed the project from start to finish. Mitutoyo has managed the complete project to make the process as easy and customer friendly as possible."


