- Nederlands, Belgique / België
- Česky, Česká republika
- Deutsch, Deutschland
- Español, España
- Português, Portugal
- English, Europe
- Français, France
- Italiano, Italia
- Magyar, Magyarország
- Nederlands, Nederland
- Deutsch, Österreich
- Polski, Polska
- Română, România
- Français / Deutsch, Suisse / Schweiz
- Svenska, Sverige
- Suomeksi, Suomi
- Türkçe, Türkiye
- English, United Kingdom
- Slovenská, Slovak
-
Worldwide
- All Small Tools
- Calipers
- Micrometers & Micrometer Heads
- Inside Measuring Instruments
- Depth Measuring Instruments
- Height Gauges
- Indicators & Caliper Gauges
- Calibration Instruments
- Gauge Blocks
- Auxiliary Equipment
- All CMM
- Small & Medium sized CMMs
- Large sized CMMs
- In-line & Shopfloor CMMs
- Probes
- Styli
- Enclosures
- CMM Software
- Fixtures and Loading Systems
- Accessories
- All Vision
- Manual 2D Vision Systems
- Manual 3D Vision Systems
- 3D CNC Vision Systems
- 3D CNC Multi-sensor Vision Systems
- MiSCAN Vision Systems
- 3D CNC Micro Geometry Vision Systems
- Vision System Software
- Vision System Accessories
- All Optical
- Magnifiers
- Measuring Projectors
- Measuring Microscopes
- Microscope Units
- Objective Lenses
- TAGLENS
- Illumination Units
- All Hardness
- Portable Hardness Testers
- Rockwell Testers
- Vickers Testers
- Automatic Vickers Testers
- Micro-Vickers Testers
- Hardness Testing Software
- Reference materials and indenters
- All Sensors
- Linear Gauges
- Low Force Gauges
- Counters and Display Units
- Laser Scan Micrometers
- Surface Measure
- Sensor Management Software
- All Data Management
- Data Management Software
- Mini Processors
- Signal Cables
- Wireless Communication
- Interfaces
- Timerbox, Digimatic Switch Box, Tolerance Box
- Micrometers & Micrometer Heads
- Digital & Mechanical Micrometers
- Micrometer Accessories
- Micrometer Heads
- Micrometer Head Accessories
- Inside Measuring Instruments
- Inside Micrometers
- Bore Gauges
- Inside Micrometer & Bore Gauge Accessories
- Indicators & Caliper Gauges
- Digital Indicators
- Indicator Accessories
- Lever Indicators
- Dial Indicators
- Dial Test Indicators Accessories
- Thickness, Caliper & Tension Gauges
- Gauge Blocks
- Steel Gauge Block Sets
- Steel Individual Gauge Blocks
- Ceramic Gauge Block Sets
- Ceramic Individual Gauge Blocks
- Special Gauge Blocks
- Gauge Block Accessories
- Small & Medium sized CMMs
- CRYSTA-Apex V - 500, 700, & 900 Series
- CRYSTA-Apex V - 1200, 1600 & 2000 Series
- CRYSTA-Apex EX Series for REVO
- STRATO-Active Series
- STRATO-Apex - 500, 700, & 900 Series
- STRATO-Apex - 1600 Series
- LEGEX Series
- Styli
- Styli Kits
- Straight Styli
- Diamond Coated Styli
- Master Ball
- Machine Tool Styli
- Star Styli
- Styli for Star Styli
- Cylinder Styli
- Disk Styli
- Tip Styli
- Extensions
- Holders
- Adapters
- Joints
- Screws for Cubes
- Tools
- StyliCleaner
- Fixtures and Loading Systems
- Standard Fixturing Kits
- Eco-Fix Kits
- Custom Fixtures from MGT
- Custom Loading Systems from MGT
- 3D CNC Vision Systems
- Quick Vision ACTIVE
- Quick Vision APEX / HYPER
- Quick Vision ACCEL
- Quick Vision ULTRA
- Measuring Projectors
- PJ Series
- PV Series
- PH Series
- M2 Software
- Data Processing Unit
- Edge Detection Sensor
- Accessories
- Measuring Microscopes
- TM Series Gen. B
- MF Series Gen. D
- MF-U Series Gen. D
- Illumination Sources
- Vision Unit
- QSPAK-VUE Software
- Objective Lenses
- ML-Series Objectives
- Brightfield Observation Objectives
- Brightfield/Darkfield Observation Objectives
- NIR Objectives
- NIR LCD Objectives
- NUV Objectives
- NUV LCD Objectives
- UV Objectives
- UV LCD Objectives
- Surface Roughness
- Surftest SJ-220
- Surftest SJ-310
- Surftest SJ-410
- Surftest SJ-500
- Surftest SJ-500P
- Surftest SV-2100P
- Formtracer Avant FTA-S3000
- Surftest Extreme SV-3000CNC
- Surftest Extreme SV-M3000CNC
- Surface Roughness & Contour
- Formtracer Avant FTA-D3000 / FTA-D4000 Series
- Formtracer CS-3300
- Formtracer Extreme SV-C4500CNC
- Formtracer Extreme SV-C4500CNC HYBRID Type 1
- Formtracer Extreme CS-5000CNC and CS-H5000CNC
- Portable Hardness Testers
- Impact Type Hardness Testing Unit HARDMATIC HH-411
- Digital and Analogue Durometers HARDMATIC HH-300
- Rockwell Testers
- Rockwell HR-200/300/400
- Rockwell, Rockwell Superficial, Brinell Hardness Tester HR-530 and HR-600
- Rockwell Automatic Hardness Testing HR-600
- Automatic Vickers Testers
- Automatic Micro-Vickers hardness testing systems
- Automatic Vickers hardness testing systems
- Reference materials and indenters
- Hardness reference materials
- Hardness indenters and replacement balls
- Linear Gauges
- ABSOLUTE Digimatic Linear Gauge LGS Series
- Air Drive Unit
- Standard Linear Gauge LGF Series
- Linear Gauge LG100 Series
- Linear Gauge LG200 Series
- Laser Hologauge
- Counters and Display Units
- EJ Counter and Interfaces for Linear Gauges
- EC Counter for Linear Gauges
- EG Counter for Linear Gauges
- EB Counter for Linear Gauges
- EH Counter for Linear Gauges
- EV Counter for Linear Gauges
- Display Unit for EV Counter
- Laser Scan Micrometers
- Laser Scan Micrometer Measuring Unit and Display Unit Package
- Laser Scan Micrometer Measuring Unit
- Laser Scan Micrometer
- Laser Scan Micrometer Display Unit
- Laser Scan Micrometer Optional Accessories
- DRO Linear Scales and Counters
- DRO Linear Scales AT103
- DRO Linear Scales AT103 - High Accuracy
- DRO Linear Scales AT113
- DRO Linear Scales AT113 - High Accuracy
- DRO Linear Scales AT116
- DRO ABS Linear Scales AT715
- Universal DRO KA-200 Counter
- NC Linear Scales
- NC Linear Scales ST36
- NC Linear Scales ST46-EZA
- NC Linear Scales ABS ST700
- NC Linear Scales ABS ST1300
- NC Linear Scales AT211
- NC Linear Scales ABS AT1100
- NC Linear Scales ABS AT1300
- Scale Units
- Horizontal ABSOLUTE Scale Coolant Proof IP66
- Horizontal ABSOLUTE Scale Standard
- Horizontal ABSOLUTE Scale Measurement Direction Switching
- Horizontal ABSOLUTE Scale Diameter Function
- Vertical ABSOLUTE Scale Standard
- Vertical ABSOLUTE Scale Measurement Direction Switching
- Vertical ABSOLUTE Scale Diameter Function
- Signal Cables
- USB Input Tool Direct (Digimatic-USB Cable)
- Digimatic Data Cables
- Digimatic Extension Cables
- Wireless Communication
- Wireless Communication System U-WAVE
- U-WAVE Bluetooth
- U-WAVE-T Connection Cables and Connection Units
- Interfaces
- USB Input Tool
- DMT-3T / FS2 USB
- DMX-1 USB
- DMX-2 S
- DMX-2 USB
- DMX-3 USB
- MUX-10F
- DMX-8/2
- DMX-16 / DMX-16C
- DMX-0-1 USB / DMX-3-2 USB
- Digimatic Interface MIG
 Aerospace
Complex aerospace applications need fast, extremely precise quality control to ensure accurate assemblies. See how Mitutoyo makes it happen
 Automotive
The automotive industry continues to innovate, and Mitutoyo delivers the advanced inspection and scanning capabilities to help manufacturers achieve ongoing production
 Energy
Mitutoyo’s measurement and analysis solutions are designed to help energy providers improve reliability and increase equipment uptime.
 Medical
To protect patient well-being, medical applications require exceptional accuracy. See how extensively tested solutions from Mitutoyo can help you achieve it.
 Electronics
The non-contact and vision measurement solutions from Mitutoyo bring microscopic accuracy to smaller and denser electronic components
 Original Equipment Manufacturers
Mitutoyo OEM can address missing expertise or resources by supplying you with our renowned Metrology equipment that seamlessly integrates into your products.
 UKAS Calibration
Our UKAS accredited laboratory can handle all your metrology needs.
 Subcontract Measurement
A full range of subcontract measurement, reporting and programming services.
 Training
Specialist in-house and on-site courses covering all types of metrology.
 Repairs & Spare Parts
Dedicated in-house repairs workshop and spare part service.
 IT Support
Perfect and hassle-free installation and integration into your IT infrastructure.
 FREE Education Pack
A range of education literature designed to serve as convenient references to dimensional metrology.
 Metrology Handbook
Aimed at anyone interested in gaining an understanding of the fundamentals of dimensional metrology.
 E-Learning
For those interested in metrology, Mitutoyo offers E-Learning courses to help train students, staff, or even hobbyists.
 Mitutoyo Worldwide
The world's biggest metrology company
 Mitutoyo in the UK
Mitutoyo have four facilities offering a wide range of services in the UK.
 EKO House
An important key to understanding Mitutoyo's company philosophy is the EKO house donated by company founder Yehan Numata.
 Promotions & Discounts
Discover the latest product and service promotional deals and discounts available.
 Case Studies
For an overview of Mitutoyo's capabilities, take a to look over our collection of case studies.
 Newsletter
Sign up to our eNewsletter and you could win a Metrology Pack!
 Product Catalogue
View our extensive product range in our online UK catalogue.
 Software & Updates
Download our software and updates easily and conveniently. (EU website )🇪🇺
 Declarations of Conformity
Here you can download the full versions for the EU and the UK.
 Virtual Showroom
Experience our interactive virtual showroom.
 Newsletter
Sign up to our eNewsletter and you could win a Metrology Pack!
-
Products
- Back Products
- Products
-
Small Tools
- Back Small Tools All Small Tools
- Calipers
-
Micrometers & Micrometer Heads
- Back Micrometers & Micrometer Heads Micrometers & Micrometer Heads
- Digital & Mechanical Micrometers
- Micrometer Accessories
- Micrometer Heads
- Micrometer Head Accessories
-
Inside Measuring Instruments
- Back Inside Measuring Instruments Inside Measuring Instruments
- Inside Micrometers
- Bore Gauges
- Inside Micrometer & Bore Gauge Accessories
-
Depth Measuring Instruments
- Back Depth Measuring Instruments Depth Measuring Instruments
- Depth Micrometers
- Depth Calipers & Gauges
- Depth Caliper Accessories
- Height Gauges
- Indicators & Caliper Gauges
-
Calibration Instruments
- Back Calibration Instruments Calibration Instruments
- Height Masters
- Check Masters
- Calibration Tools
- Gauge Blocks
- Auxiliary Equipment
-
CMM
- Back CMM All CMM
- Small & Medium sized CMMs
-
Large sized CMMs
- Back Large sized CMMs Large sized CMMs
- CARB-Series
-
In-line & Shopfloor CMMs
- Back In-line & Shopfloor CMMs In-line & Shopfloor CMMs
- MACH Ko-ga-me
- MACH 3A 653
- MACH V 9106
- MiSTAR 555
- Probes
- Styli
-
Enclosures
- Back Enclosures Enclosures
- CMM Enclosures
-
CMM Software
- Back CMM Software CMM Software
- MiCAT Planner
- MCOSMOS
- MAFIS Express
- MSURF
-
Fixtures and Loading Systems
- Back Fixtures and Loading Systems Fixtures and Loading Systems
- Standard Fixturing Kits
- Eco-Fix Kits
- Custom Fixtures from MGT
- Custom Loading Systems from MGT
-
Accessories
- Back Accessories Accessories
- CMM Verification Artefact
- CMM Monitor Stand
-
Vision
- Back Vision All Vision
-
Manual 2D Vision Systems
- Back Manual 2D Vision Systems Manual 2D Vision Systems
- Quick Image
- Quick Image Software
-
Manual 3D Vision Systems
- Back Manual 3D Vision Systems Manual 3D Vision Systems
- Manual Quick Scope
- Quick Scope Software
-
3D CNC Vision Systems
- Back 3D CNC Vision Systems 3D CNC Vision Systems
- Quick Vision ACTIVE
- Quick Vision APEX / HYPER
- Quick Vision ACCEL
- Quick Vision ULTRA
-
3D CNC Multi-sensor Vision Systems
- Back 3D CNC Multi-sensor Vision Systems 3D CNC Multi-sensor Vision Systems
- Quick Vision Hybrid
- Quick Vision WLI
-
MiSCAN Vision Systems
- Back MiSCAN Vision Systems MiSCAN Vision Systems
- MiSCAN APEX 404
- MiSCAN HYPER 302
- MiSCAN HYPER 404
-
3D CNC Micro Geometry Vision Systems
- Back 3D CNC Micro Geometry Vision Systems 3D CNC Micro Geometry Vision Systems
- UMAP Vision Systems
- UMAP Software
- Vision System Software
- Vision System Accessories
-
Optical
- Back Optical All Optical
-
Magnifiers
- Back Magnifiers Magnifiers
- Pocket Comparator
- Clear Loupes
-
Measuring Projectors
- Back Measuring Projectors Measuring Projectors
- PJ Series
- PV Series
- PH Series
- M2 Software
- Data Processing Unit
- Edge Detection Sensor
- Accessories
- Measuring Microscopes
-
Microscope Units
- Back Microscope Units Microscope Units
- Microscope Unit FS70 Series
- Video Microscope Unit VMU Series
- Objective Lenses
- TAGLENS
- Illumination Units
- Form
-
Hardness
- Back Hardness All Hardness
- Portable Hardness Testers
- Rockwell Testers
-
Vickers Testers
- Back Vickers Testers Vickers Testers
- Vickers Hardness Testing Machine HV-110/120
- Automatic Vickers Testers
-
Micro-Vickers Testers
- Back Micro-Vickers Testers Micro-Vickers Testers
- Micro-Vickers Hardness Testing Machines HM-210/220
-
Hardness Testing Software
- Back Hardness Testing Software Hardness Testing Software
- AVPAK
-
Reference materials and indenters
- Back Reference materials and indenters Reference materials and indenters
- Hardness reference materials
- Hardness indenters and replacement balls
- Sensors
-
Digital Scales
- Back Digital Scales All Digital Scales
- DRO Linear Scales and Counters
- NC Linear Scales
-
Scale Units
- Back Scale Units Scale Units
- Horizontal ABSOLUTE Scale Coolant Proof IP66
- Horizontal ABSOLUTE Scale Standard
- Horizontal ABSOLUTE Scale Measurement Direction Switching
- Horizontal ABSOLUTE Scale Diameter Function
- Vertical ABSOLUTE Scale Standard
- Vertical ABSOLUTE Scale Measurement Direction Switching
- Vertical ABSOLUTE Scale Diameter Function
-
Data Management
- Back Data Management All Data Management
-
Data Management Software
- Back Data Management Software Data Management Software
- MeasurLink 10
- USB-ITPAK
-
Mini Processors
- Back Mini Processors Mini Processors
- Digimatic Mini Processor DP-1VA LOGGER
- Signal Cables
- Wireless Communication
- Interfaces
-
Timerbox, Digimatic Switch Box, Tolerance Box
- Back Timerbox, Digimatic Switch Box, Tolerance Box Timerbox, Digimatic Switch Box, Tolerance Box
- Digimatic Timerbox
- Digimatic Data Logger
- Digimatic Switch Box
- Digimatic Tolerance Box
-
Software
- Back Software All Software
-
CMM Software
- Back CMM Software CMM Software
- MiCAT Planner
- MCOSMOS
- MAFIS-Express
- MSURF
- Vision System Software
-
Form Software
- Back Form Software Form Software
- Formtracepak
- Roundpak
- Hardness Testing Software
- Sensor Management Software
-
Data Management Software
- Back Data Management Software Data Management Software
- Measurlink 10
- USB-ITPAK
- Bespoke
- Industries
-
Services
- Back Services
- Services
-
Bespoke Solutions
- Back Bespoke Solutions
- Bespoke Solutions
- UKAS Calibration
-
Subcontract Measurement
- Back Subcontract Measurement
- Subcontract Measurement
- Training
- Repairs & Spare Parts
- IT Support
- Support
- Education
-
Corporate
- Back Corporate
- Corporate
-
Mitutoyo Worldwide
- Back Mitutoyo Worldwide
- Mitutoyo Worldwide
- Name & Philosophy
- Factory Tours
- Mitutoyo Corporation
-
Mitutoyo History
- Back Mitutoyo History
- Mitutoyo History
- Mitutoyo in Europe
- Global Gateway
-
Mitutoyo in the UK
- Back Mitutoyo in the UK
- Mitutoyo in the UK
- Job Opportunities
- Certifications & Accreditations
- Sustainability
- EKO House
-
News
- Back News
- News
-
Events & Exhibitions
- Back Events & Exhibitions
- Events & Exhibitions
-
Promotions & Discounts
- Back Promotions & Discounts
- Promotions & Discounts
- Case Studies
- Newsletter
-
Resources
- Back Resources
- Resources
-
Product Literature
- Back Product Literature
- Product Literature
- Product Catalogue
- Software & Updates
- Declarations of Conformity
- Virtual Showroom
- Newsletter
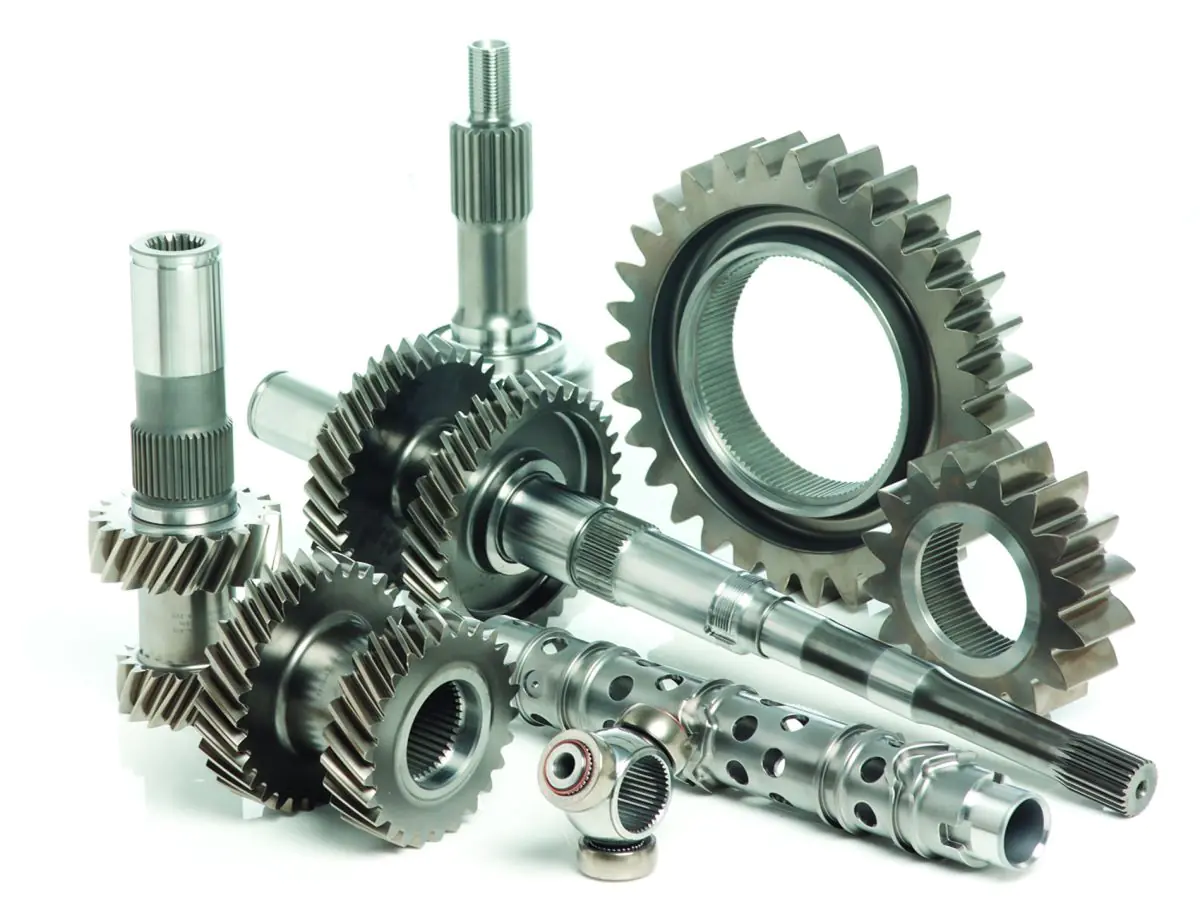
Widely recognised as the world leader in the design and manufacture of transmission and drive train technology, Xtrac has built its business and reputation on a passion for innovation, precision and quality. So, when the company needed a metrology supplier with likeminded principles, the Thatcham based Company naturally turned to Mitutoyo.
Xtrac still powering along with Mitutoyo

Established in 1984, and manufacturing everything from casings through to gears, shafts, crown wheels and pinions and everything else that constitutes a high performance motorsport transmission system; Xtrac utilises high specification casting, milling, turning, grinding, EDM, surface finishing, gear cutting and grinding technologies – all inspected with Mitutoyo metrology equipment.
Xtrac Inspection Manager Mr Neil Warwick has been at the staff owned business since it was a small 15 employee company back in 1988. At the once fledgling company, Mr Warwick was instrumental in specifying Mitutoyo equipment almost 30 years ago.
Recalling the first Mitutoyo CMM the company purchased, Mr Warwick says: "At the time, all our customers in the motorsport and F1 industries were employing Mitutoyo equipment. We looked at what they were using and we wanted equipment to create a synergy with our customers. Except for the machine shop micrometers, our first foray into Mitutoyo was a manual BHN706 CMM in 1990. This was rapidly followed in the mid-1990s by Mitutoyo BHN544 and BNH706 CNC CMMs as our business rapidly expanded in line with the F1 industry widely employing our transmission technology."
In 2000, the company moved to its purpose built 88,000sq/ft UK factory to accommodate its exponential growth and this noted the arrival of numerous Mitutoyo inspection systems to support the increase manufacturing output. The Berkshire business retained its Mitutoyo CNC CMM systems with Renishaw PH Series motorised indexing heads that enable the CMM’s to achieve complete programmable probe orientation. Attached to the motorised Renishaw heads are the TP200 Series of probe bodies and stylus modules from 1mm to 6mm diameter. With CMMs in satellite inspection rooms on the shop floor as well as in the main inspection department, Xtrac specified the same probe bodies and styli for all its CMMs.
Since moving to its state-of-the-art facility over a decade ago, Xtrac has expanded to 330 staff with 20 employees in the meticulous inspection department. As part of this growth, Xtrac acquired two compact Crysta-Apex S544 CNC CMMs with a 500 by 400 by 400mm work area. One was bought to support growth and the other to replace an ageing CMM. For the inspection of larger components, Xtrac purchased a Crysta C9106 CNC CMM with a 900 by 1000 by 600mm working area. These three CMMs were accompanied by the arrival of three Crysta S776 CNC CMMs in the last two years. These most recent arrivals were all direct replacements for the BHN Series CMMs that had been at Xtrac for over 20 years.
Commenting upon this, Mr Warwick recalls: “The fact that we’ve had Mitutoyo CMMs for 20 years speaks volumes for the performance, reliability, consistency and ability of Mitutoyo CMMs to conform to our impeccable standards. Naturally the CMMs have evolved from the old DOS based systems. All our CMMs now run on Mitutoyo’s Windows based MCOSMOS 3.5 software. The technology in the modern CMMs and particularly the MCOSMOS software enables us to import CAD data, program our parts faster, improve both on and off-line part-program creation from imported CAD models and also extend our geometry handling of freeform surfaces. Added to this, the axis movements and motors in the new CMM’s are faster than previous generation CMMs, resulting in reduced inspection cycle times”

All six CMMs at Xtrac utilise the same Mitutoyo MCOSMOS software, the same workholding jigs and fixtures and also the same Renishaw probing systems. Alluding to this, Mr Warwick says: “We have a number of CMMs on the shop floor as well as in our inspection department. All CMMs are networked, so we can easily transfer programs and data to reduce programming times and eliminate program duplication. This can make inspection as simple as just a ‘touch of a button’ on the CMM.”
This level of automation is critical for a company that manufactures complex parts in small batches with an often high level of SPC and reporting required. “All our customers are different in their demands. Some customers require complete reporting and traceability whereas other customers only want inspection data for critical features. Whatever the requirement, the Mitutoyo CMMs provide comprehensive reporting on all geometrical tolerances and features, if the customers need it. Furthermore, this data is all stored on our system for historical traceability purposes.”
Tracing a Strategy For Success
With the ever increasing complexity of parts, a CMM cannot support the measuring of all geometries and features. This was apparent for Xtrac when a particular F1 component had undercuts on form gears that needed to be machined and measured to tolerances of +/-5 microns. Commenting on this, Mr Warwick recalls: “We had a specific need to measuring a feature that couldn’t be resolved with a CMM. We got in contact with Mitutoyo and they recommended a Contracer.”
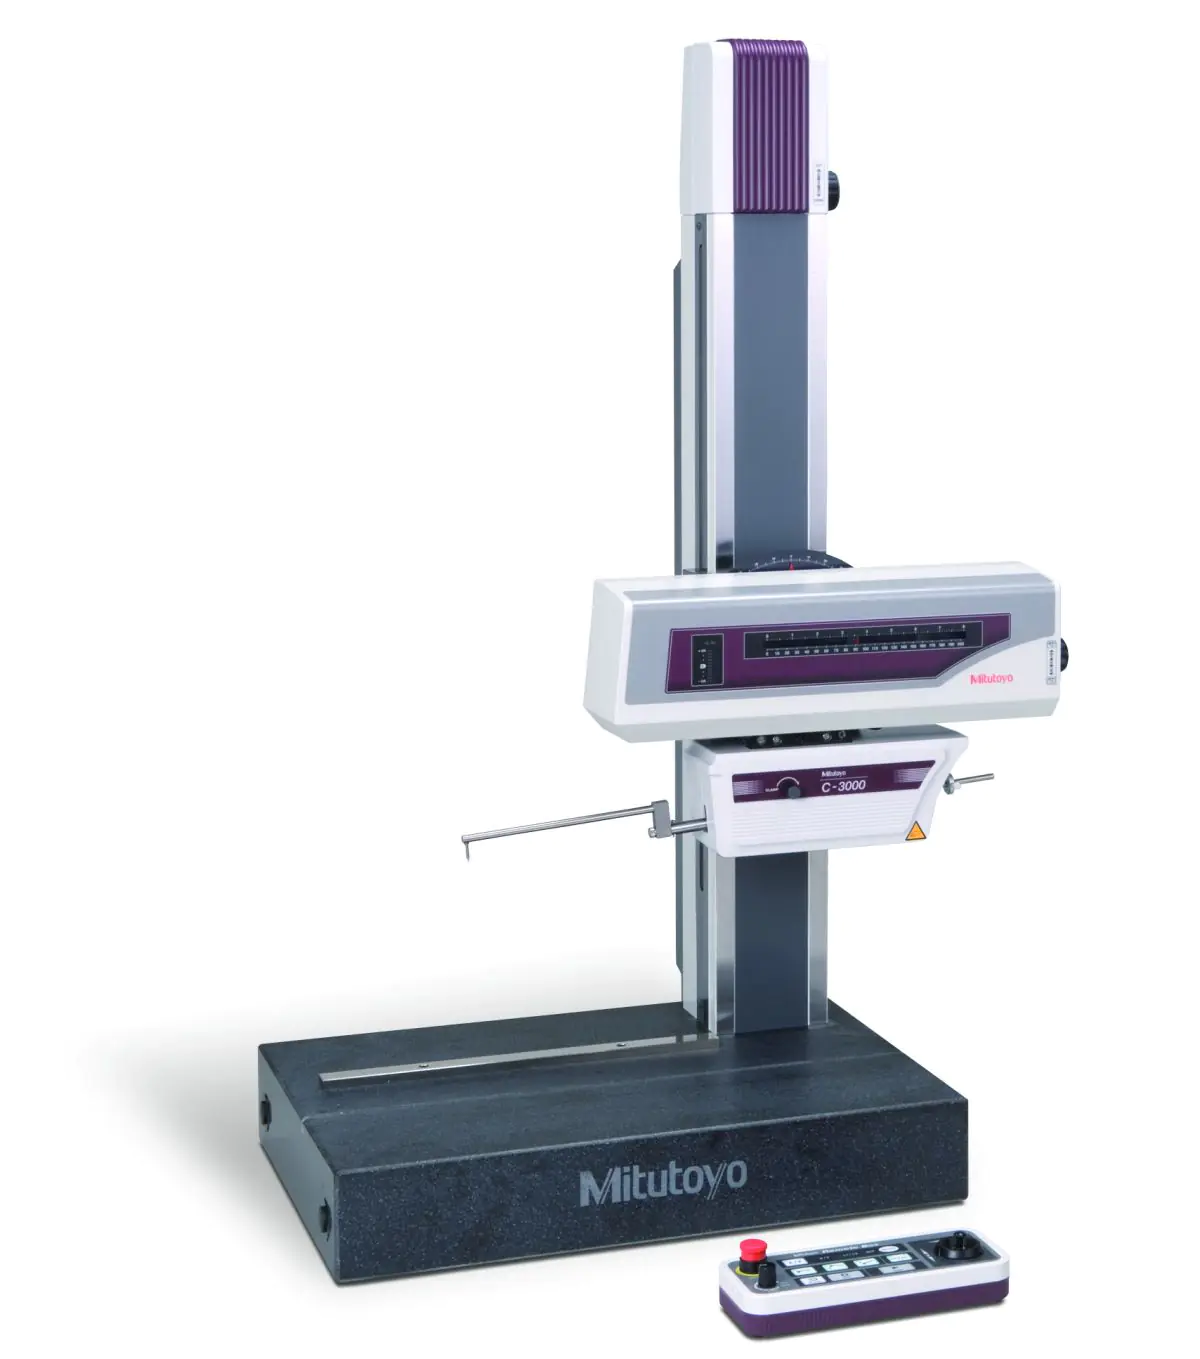
The Formtracer contour measuring machine delivers extremely precise and simplified CNC measurement. Featuring a precision arc-scale built into the Z1 axis detector that allows the arc trajectory of the stylus tip to be read directly, the Formtracer SVC-3100W8 specified by Xtrac minimizes error for best in-class accuracy. “The Formtracer arrived over 10 years ago, but we quickly realised how the Formtracer complements the CMMs. With the inclusion of surface texture measurement hardware the Formtracer also supplemented the basic surface texture measurement equipment that was currently in use at the time.

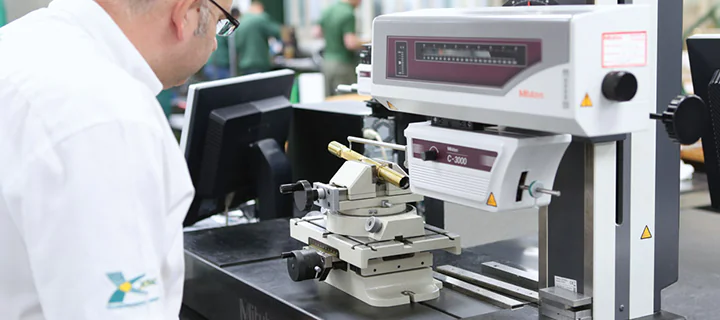
The capability and success of the Formtracer soon brought the arrival of two Contracer CV-3100H8 machines with an X and Z2 axis travel of 200mm and 500mm respectively. This was followed by a smaller CV-3100H4 machine. We use our Contracers for the 2D measuring of many non-geometric shapes and features such as undercuts, grooves and very small radii. They are fast, efficient, precise and perfectly meet our needs.”
The increasing demand for surface texture measurement, especially for gear teeth, quickly became too much of a capacity restraint for the Formtracer, leading to the purchase of dedicated, fully featured surface texture measurement machine. “We needed to increase surface finish measurement because some gear surfaces are in continuous contact with other surfaces. By controlling and measuring surface finishes on faces that are critical to the function of a component, we have minimised abrasion and enhanced the quality of critical gears and their operational functionality. The Formtracer has two heads, so it was conducting surface finish measurements as well as checking complex geometries. Before we knew it, we were loaded with work for the Formtracer, so we added a Mitutoyo SJ500P Surftest for alleviating the capacity on the Formtracer.”
The SJ500-P is a high precision, high-performance surface roughness tester with PC control and the same software as deployed on the Formtracer, so training wasn’t an issue. The built-in joystick on the control unit enables quick and easy positioning whilst a manual adjustment knob allows fine positioning of a small stylus for positioning.
Concluding upon the working relationship with Mitutoyo, Mr Warwick says: “In my 29 years with Xtrac, we have evolved from a small innovative business to a global leader in drive train and transmission systems for the most demanding motorsport and high performance engineering applications. Along our journey to global success, Mitutoyo has been at our side. Firstly, we had micrometers and vernier callipers, then manual to CNC CMMs and now the addition of Contracers, Formtracers Optical Projectors, and surface texture measurment. Down the generations, Mitutoyo has been at our side, supporting all our metrology needs with industry leading products, training and support. Over this period, the rapid emergence of ever more complex components required at shorter lead-times with greater certification has been comfortably managed by the Mitutoyo equipment. This is credit to the software and technology that networks all our metrology equipment and delivers comprehensive reporting of all the required dimensions and data.”


